In November 2023, Microsoft Copilot Studio was announced and brought a new way of creating AI-powered, intelligent, and interactive copilots to streamline work and assist people daily.
So, how do you get started with Copilot Studio? To answer that, I would highly recommend a few things:
- Review the Microsoft Documentation site
- Go through the learning paths available on the Microsoft Learn site
- Dig into the Acceleration Economy AI Index site to get a better understanding of artificial intelligence innovation, funding, and solutions
 Note: The Copilot I am referring to is the Copilot Studio solution. Microsoft offers multiple Copilots such as Dynamics 365 Copilot, Microsoft Copilot (previously Bing Chat), and Microsoft Copilot Studio Mobile (Android or Apple).
Pricing
If are you looking to jump into using Copilot Studio, you will need to purchase it. As of December 2023, Microsoft Copilot Studio (standalone) has a starting price of $200 per month per tenant for 25,000 messages. Copilot Studio is included in the $30 user license for customizing Copilot for Microsoft 365/Dynamics 365.
Note: For a detailed outline of the Dynamics 365 Copilot pricing, I would recommend reviewing the full licensing guide here: https://go.microsoft.com/fwlink/?LinkId=866544&usg=AOvVaw31TJQMIji481LIHcfzy3Qw
Licensing
Once the Copilot Solution has been purchased, you will need to be granted access to it. Per the Microsoft documentation, access can be granted by following these steps:
- Go to the Microsoft 365 admin center and sign in with your Admin account.
- On the side pane, expand the Users menu, and then select Active users.
- Select a name, and then select Manage product licenses.
- On the flyout pane, select the check box next to Power Virtual Agent user license, and then select Save changes.
Note: You can simplify license assignment by using a Microsoft Entra ID security group. Check here for more details.
Creating
Now we get to the fun part – creating a Copilot! After you have been granted the correct access, you can go to either:
- https://copilotstudio.microsoft.com/
- I would suggest using this one as the one below will likely be deprecated at some point, in my opinion.
- https://web.powerva.microsoft.com/
Copilot Studio Home Screen
Once there, you will land on the Copilot Studio home screen.
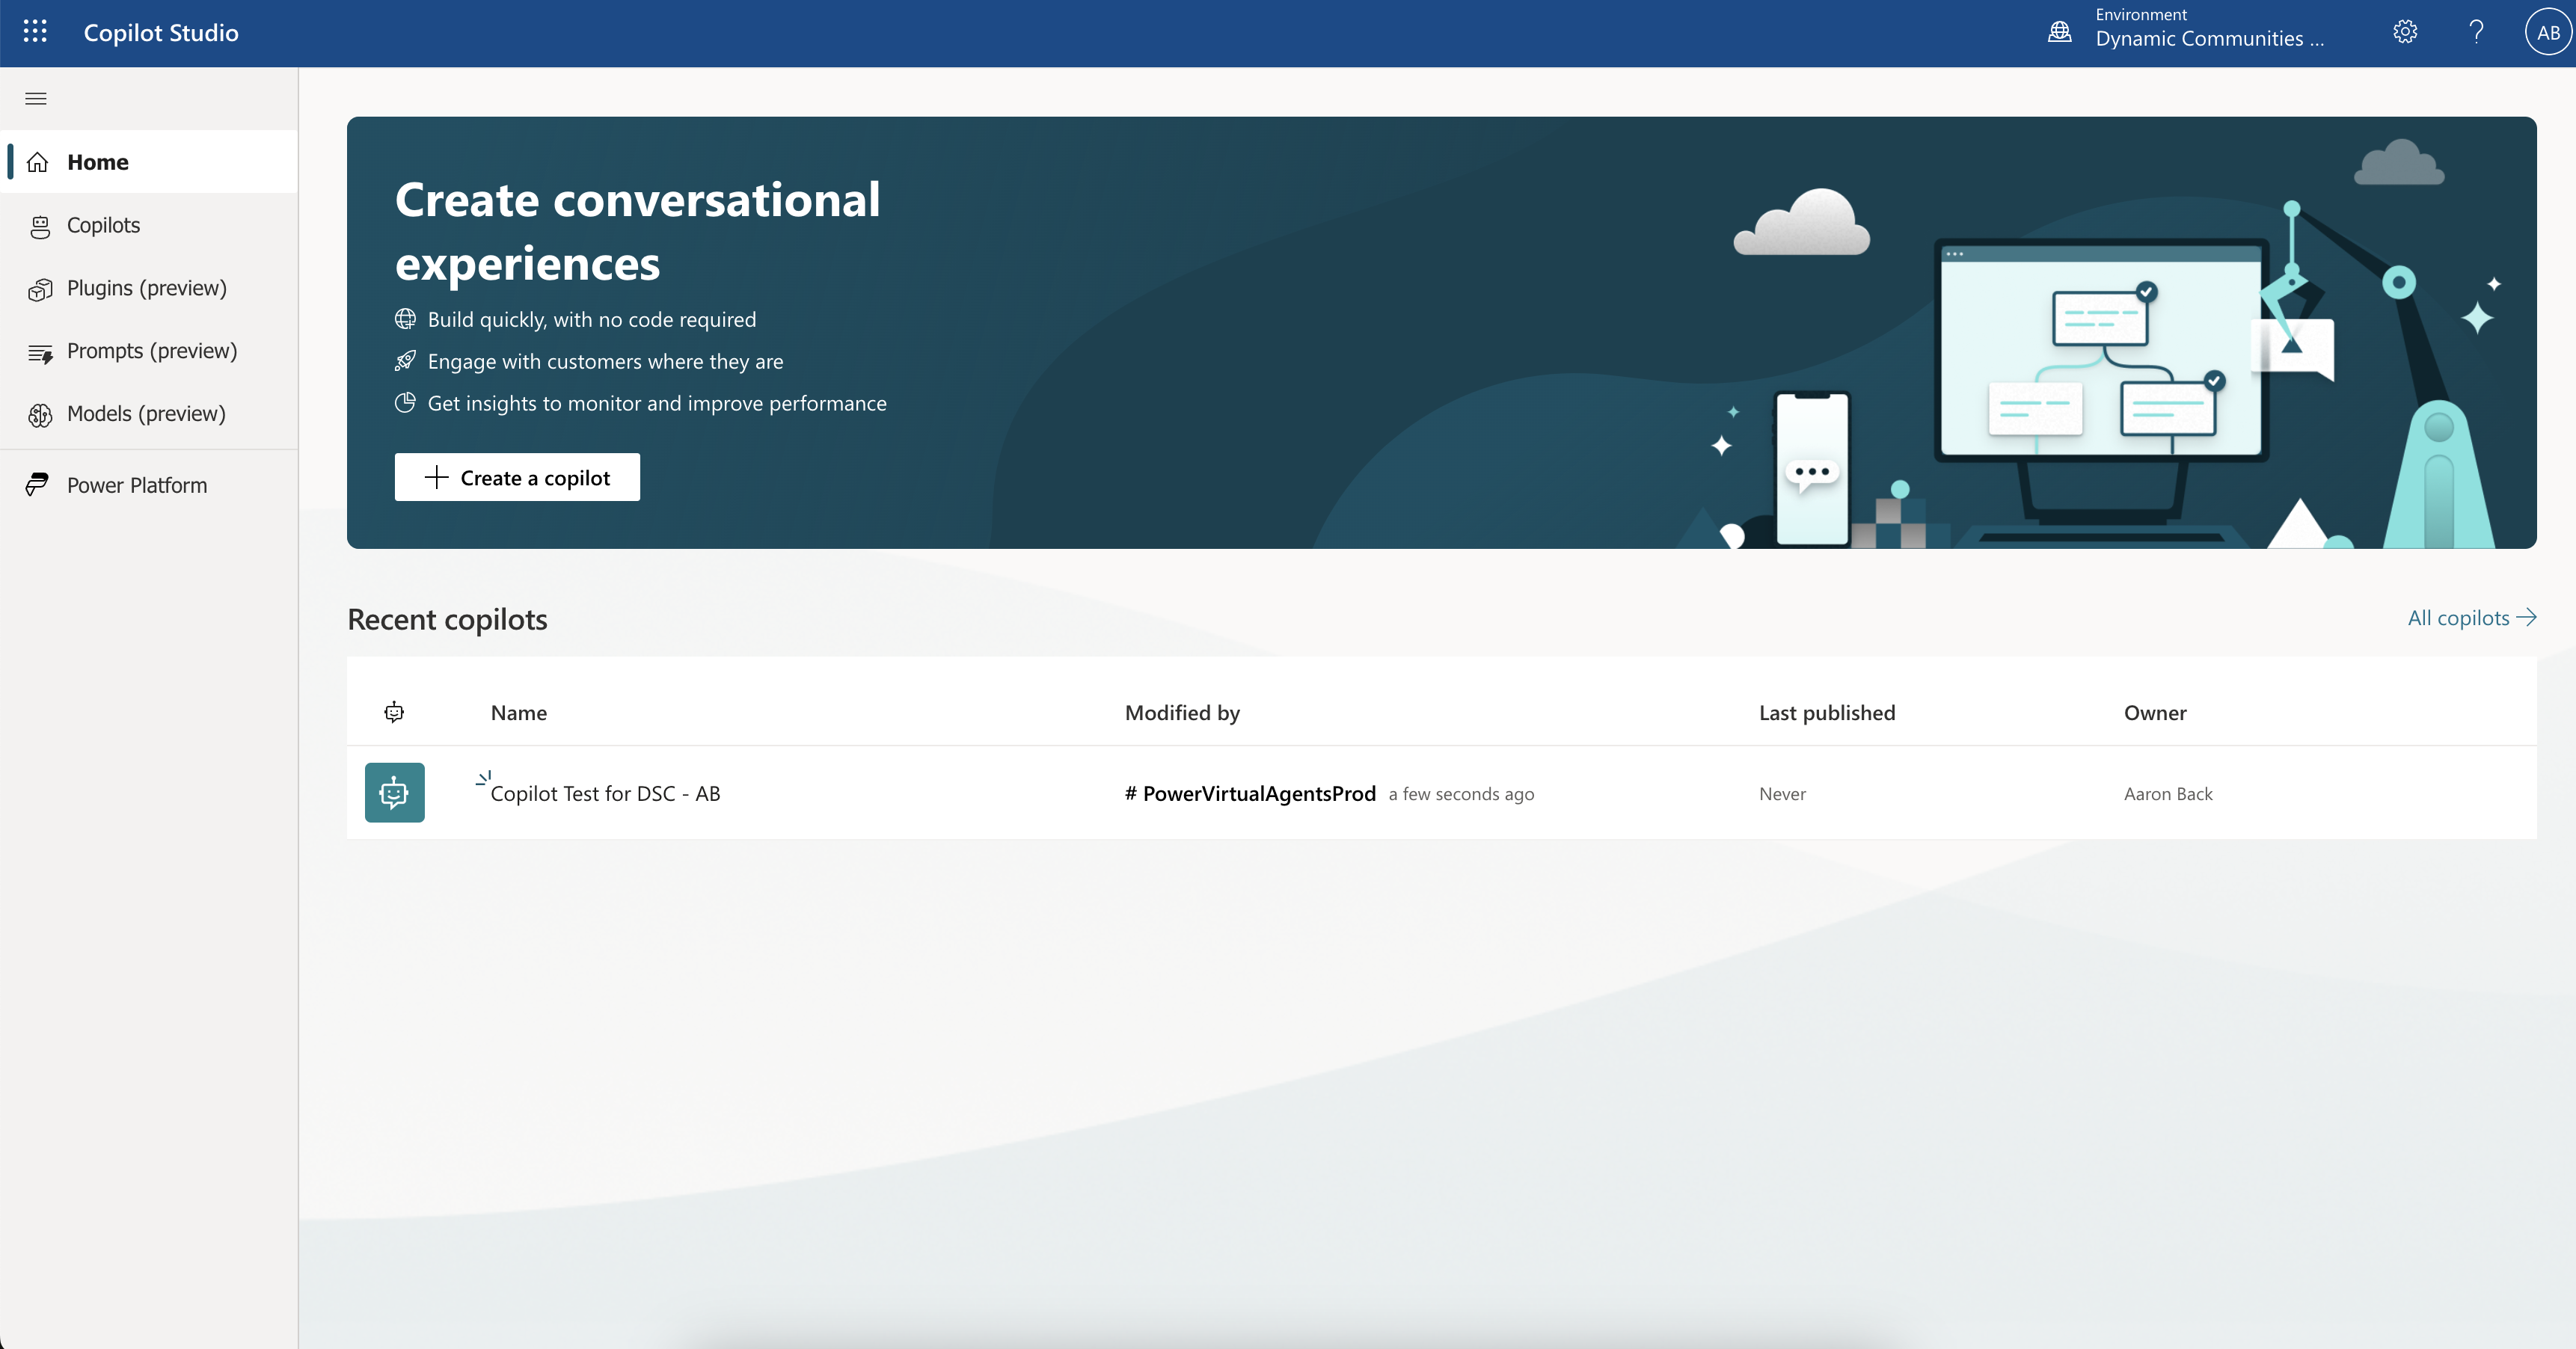
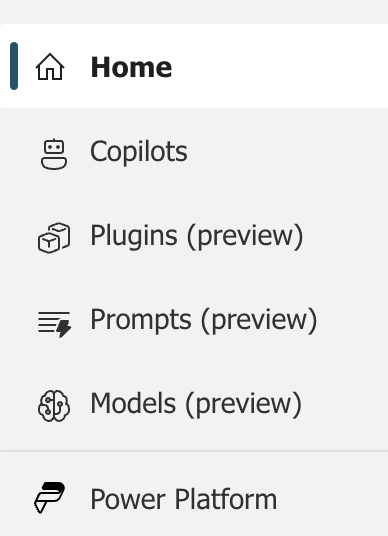
On the left-hand side, you will see the home screen menu. Please note that several of the options are currently in preview.
An important thing to note is that the home screen will (typically) be located within the Default environment. However, you can toggle to other available environments of your choice IF you have the security access to do so.
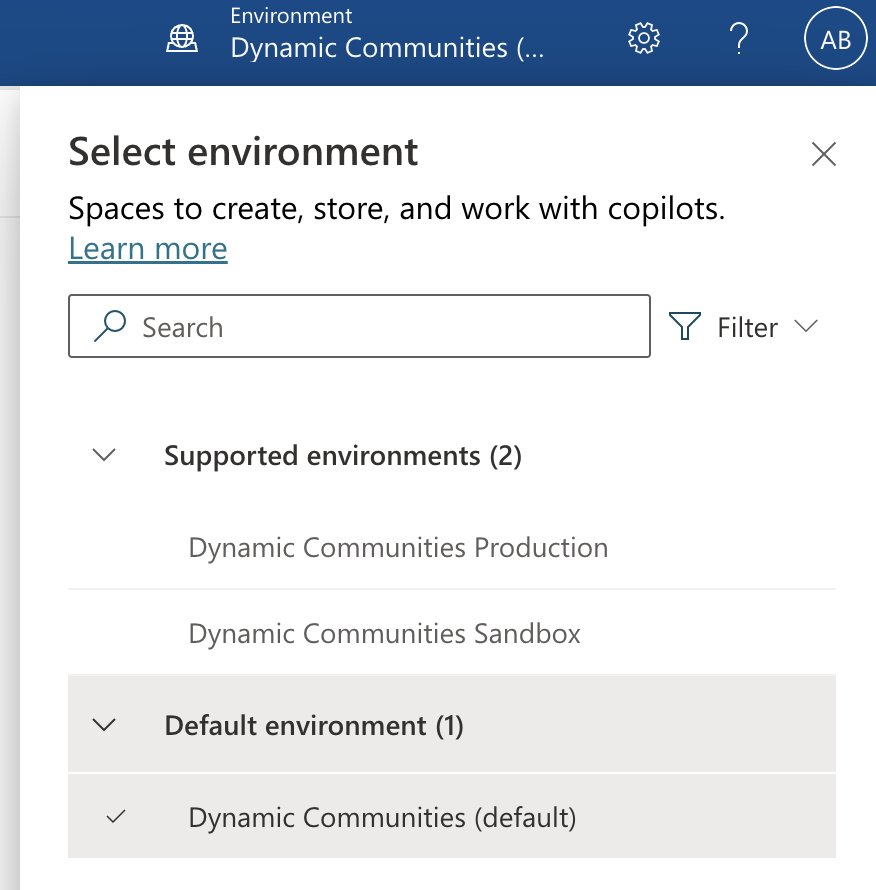
!! I would highly recommend creating your Copilot within a Sandbox environment and NOT within the Production or Default environments. If you do not see a Sandbox environment or have access to one, please contact your system administrator. !!
Creating A Copilot
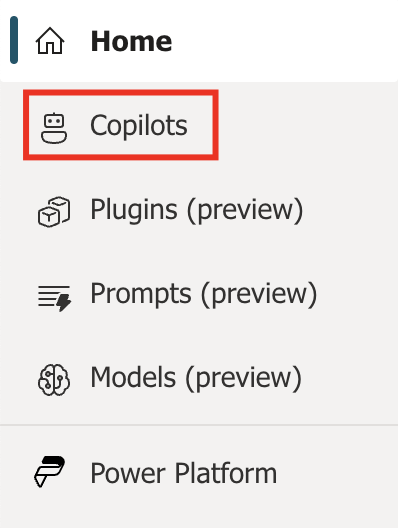
For this post’s purpose, I will focus on the Copilots area of Copilot studio. I will cover the other options at a later date.
After you select the Copilots option, you will see a screen like what you see below. Please note that the Copilots shown have been set up within the Sandbox environment.
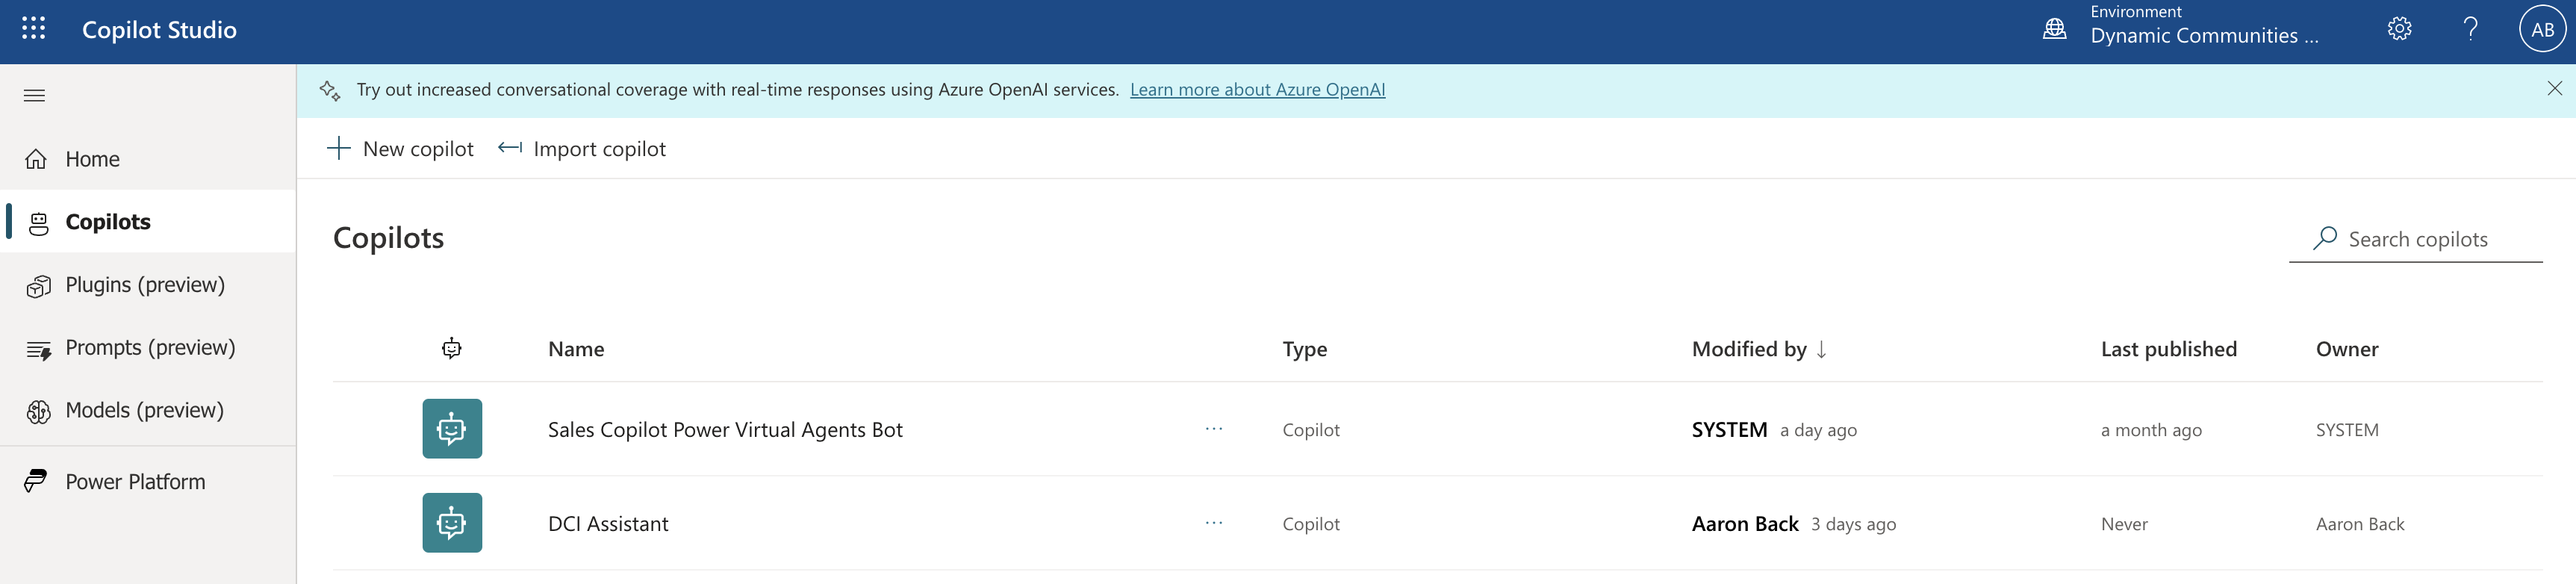
Click on the “New copilot” button at the top to start the creation process.
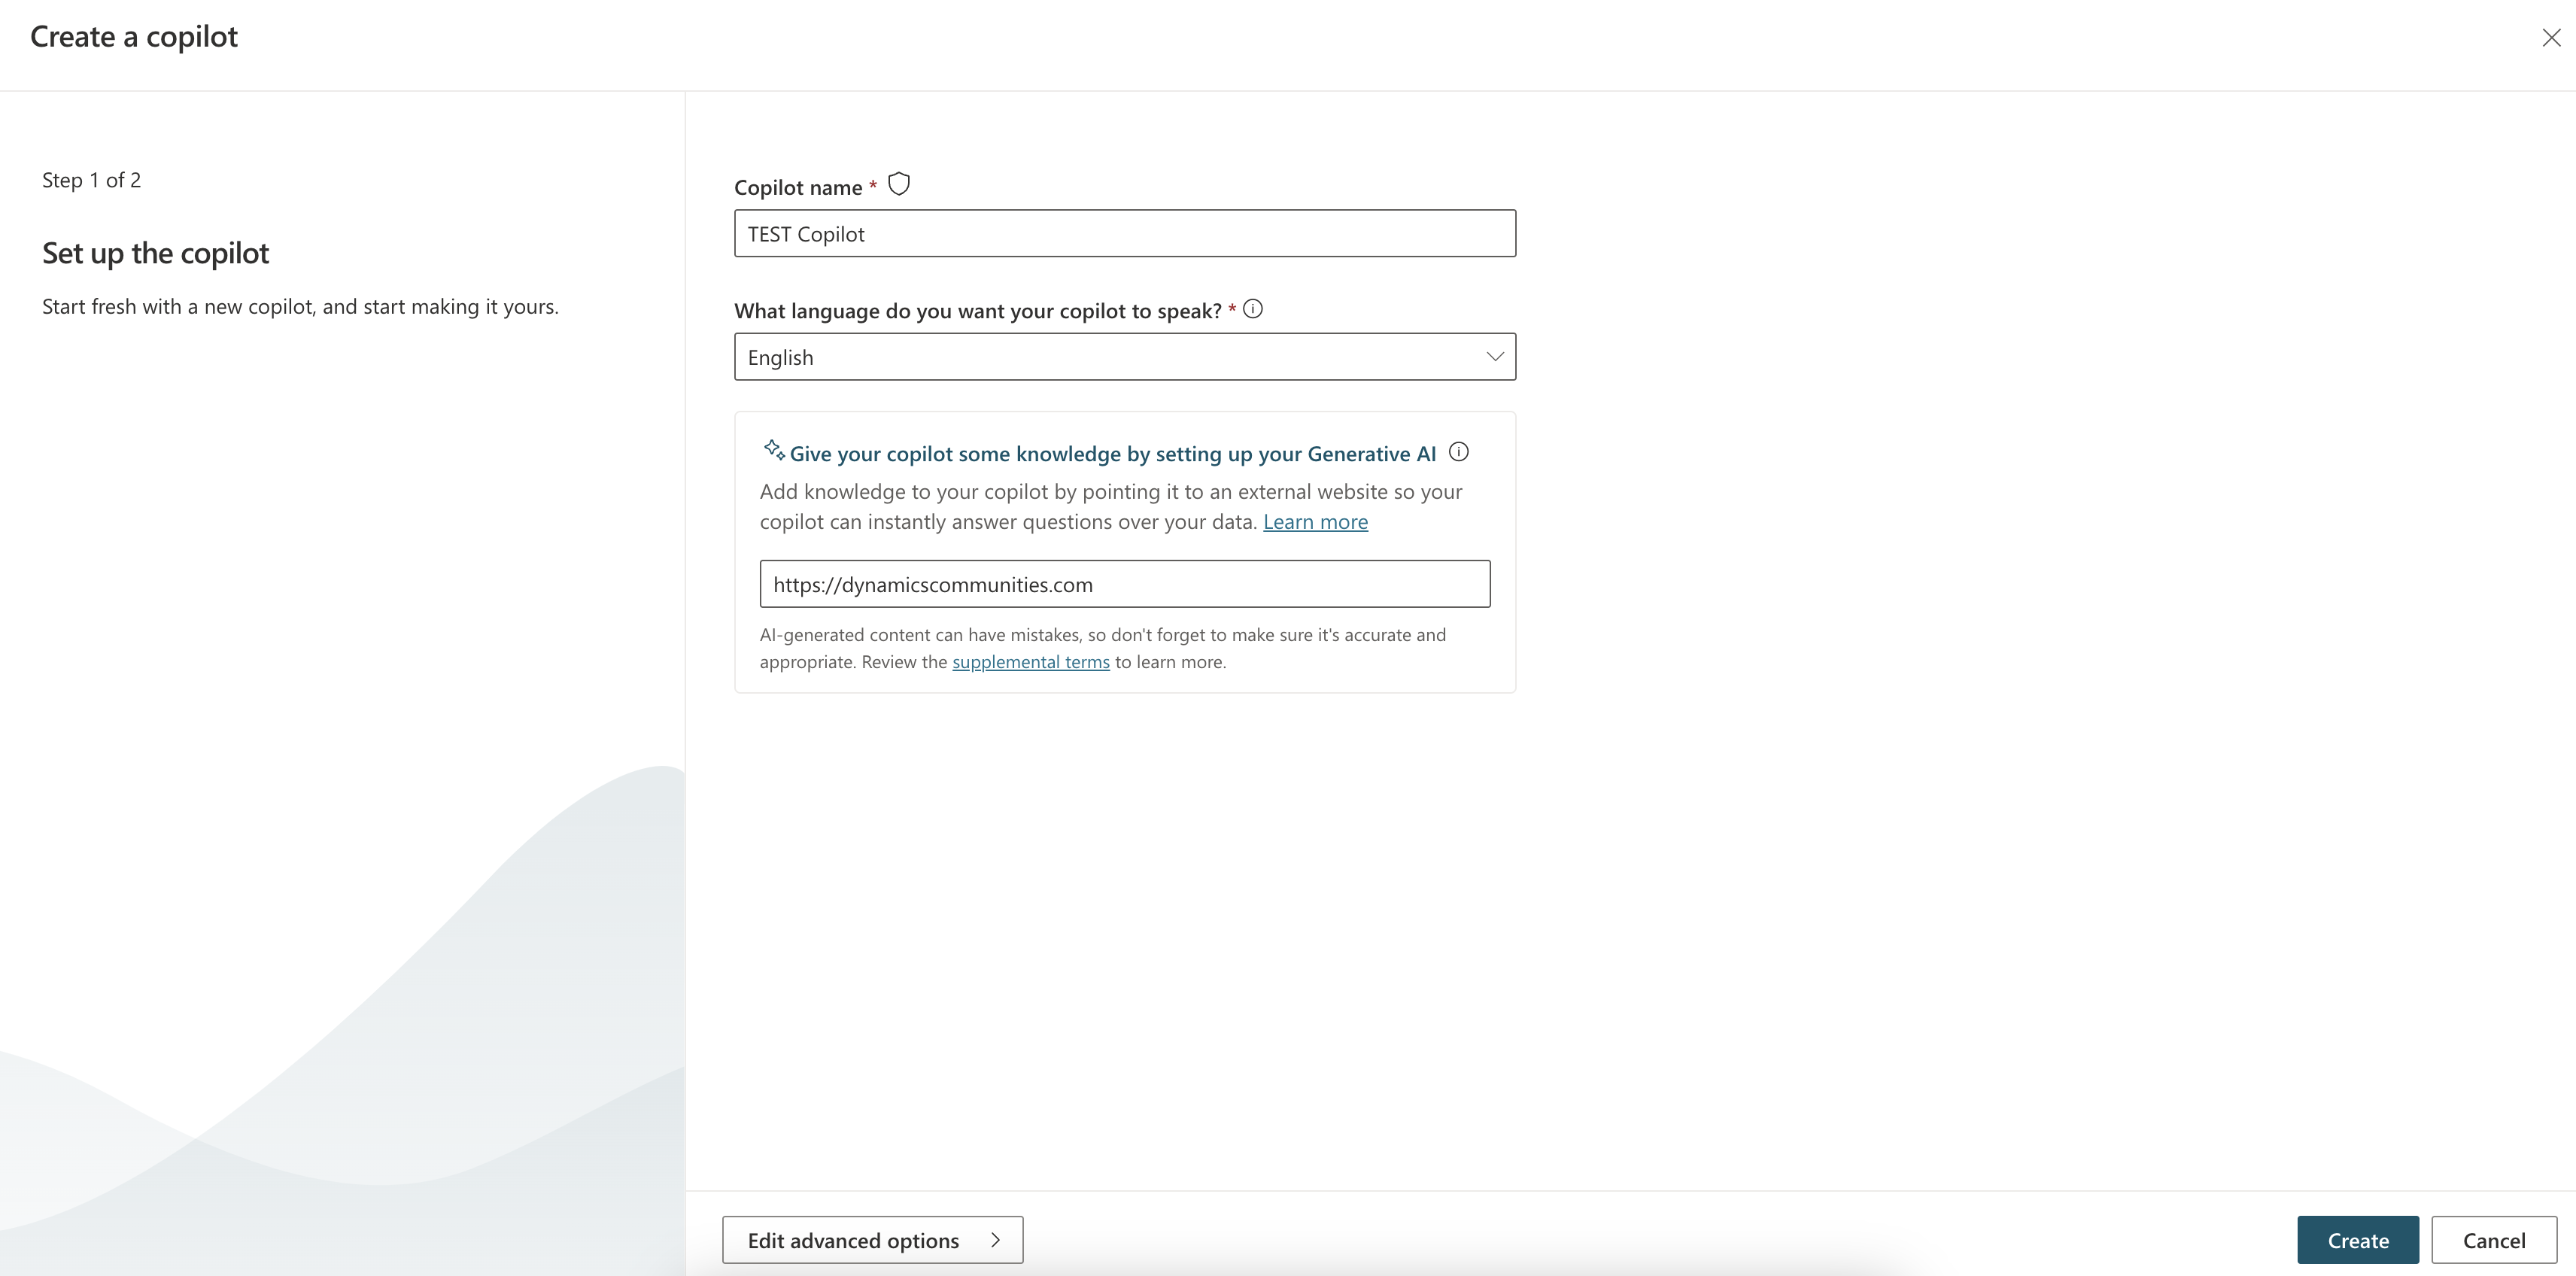
- Give the Copilot a name
- Select the language
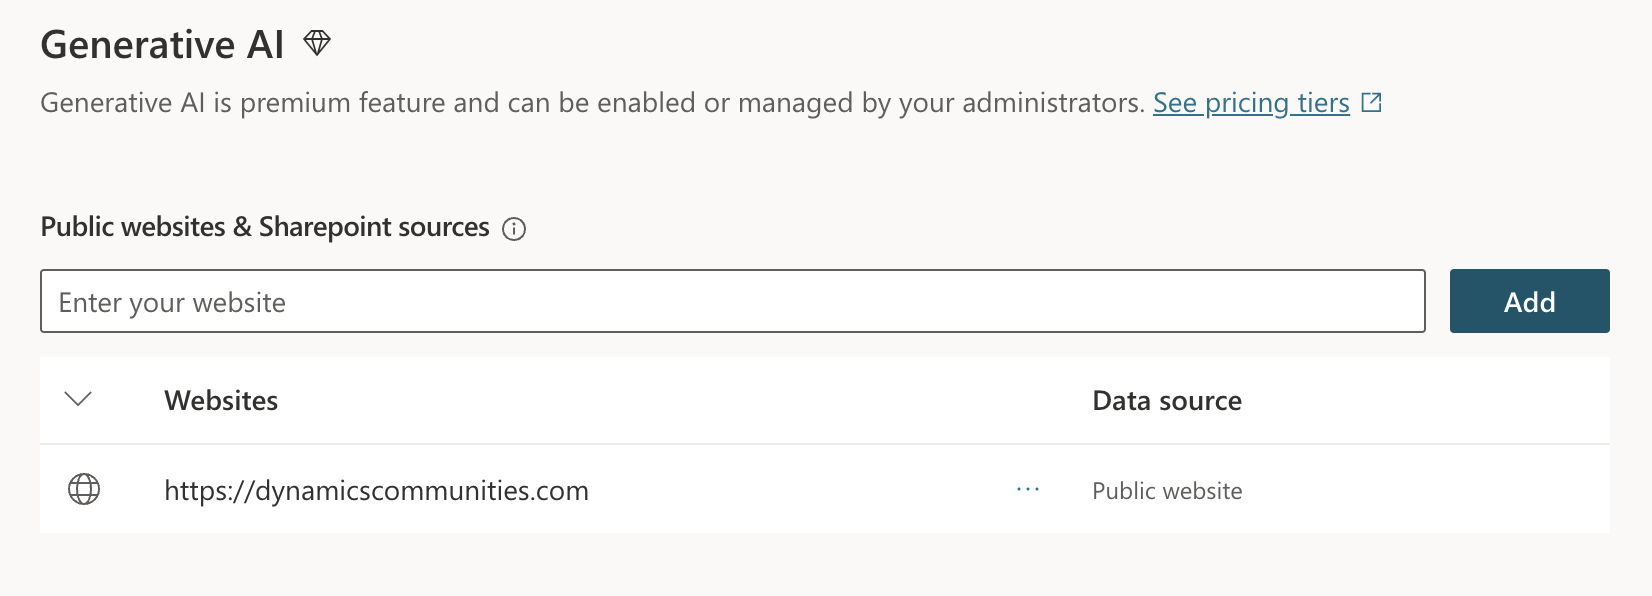
- (Optional) Include a website that can help the Generative AI “learn”
- Click Create
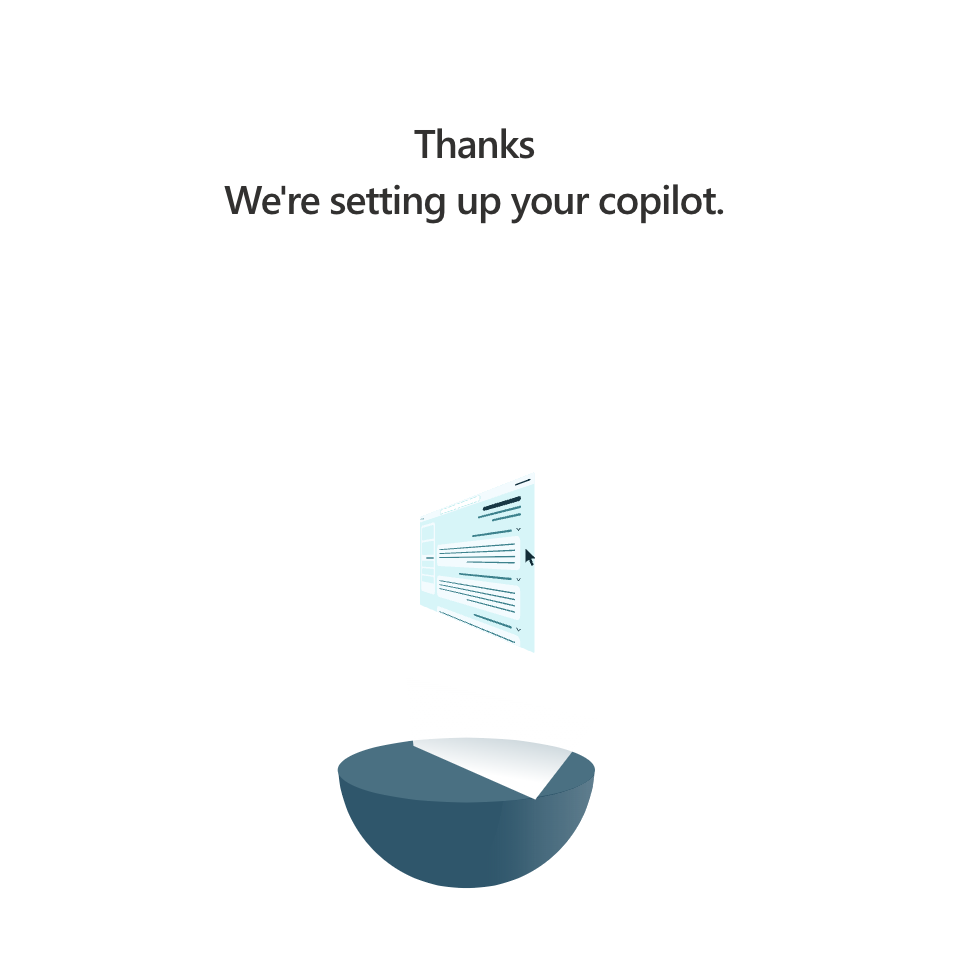
You might see this screen while the initial creation process is happening.
Copilot Studio Overview
Once the Copilot has finished the initial setup, you will see the Overview screen. Here, you will see the Copilot Name (indicated by the red arrows) in various areas. Additionally, notice the URL of the site, if you included that in the setup wizard.
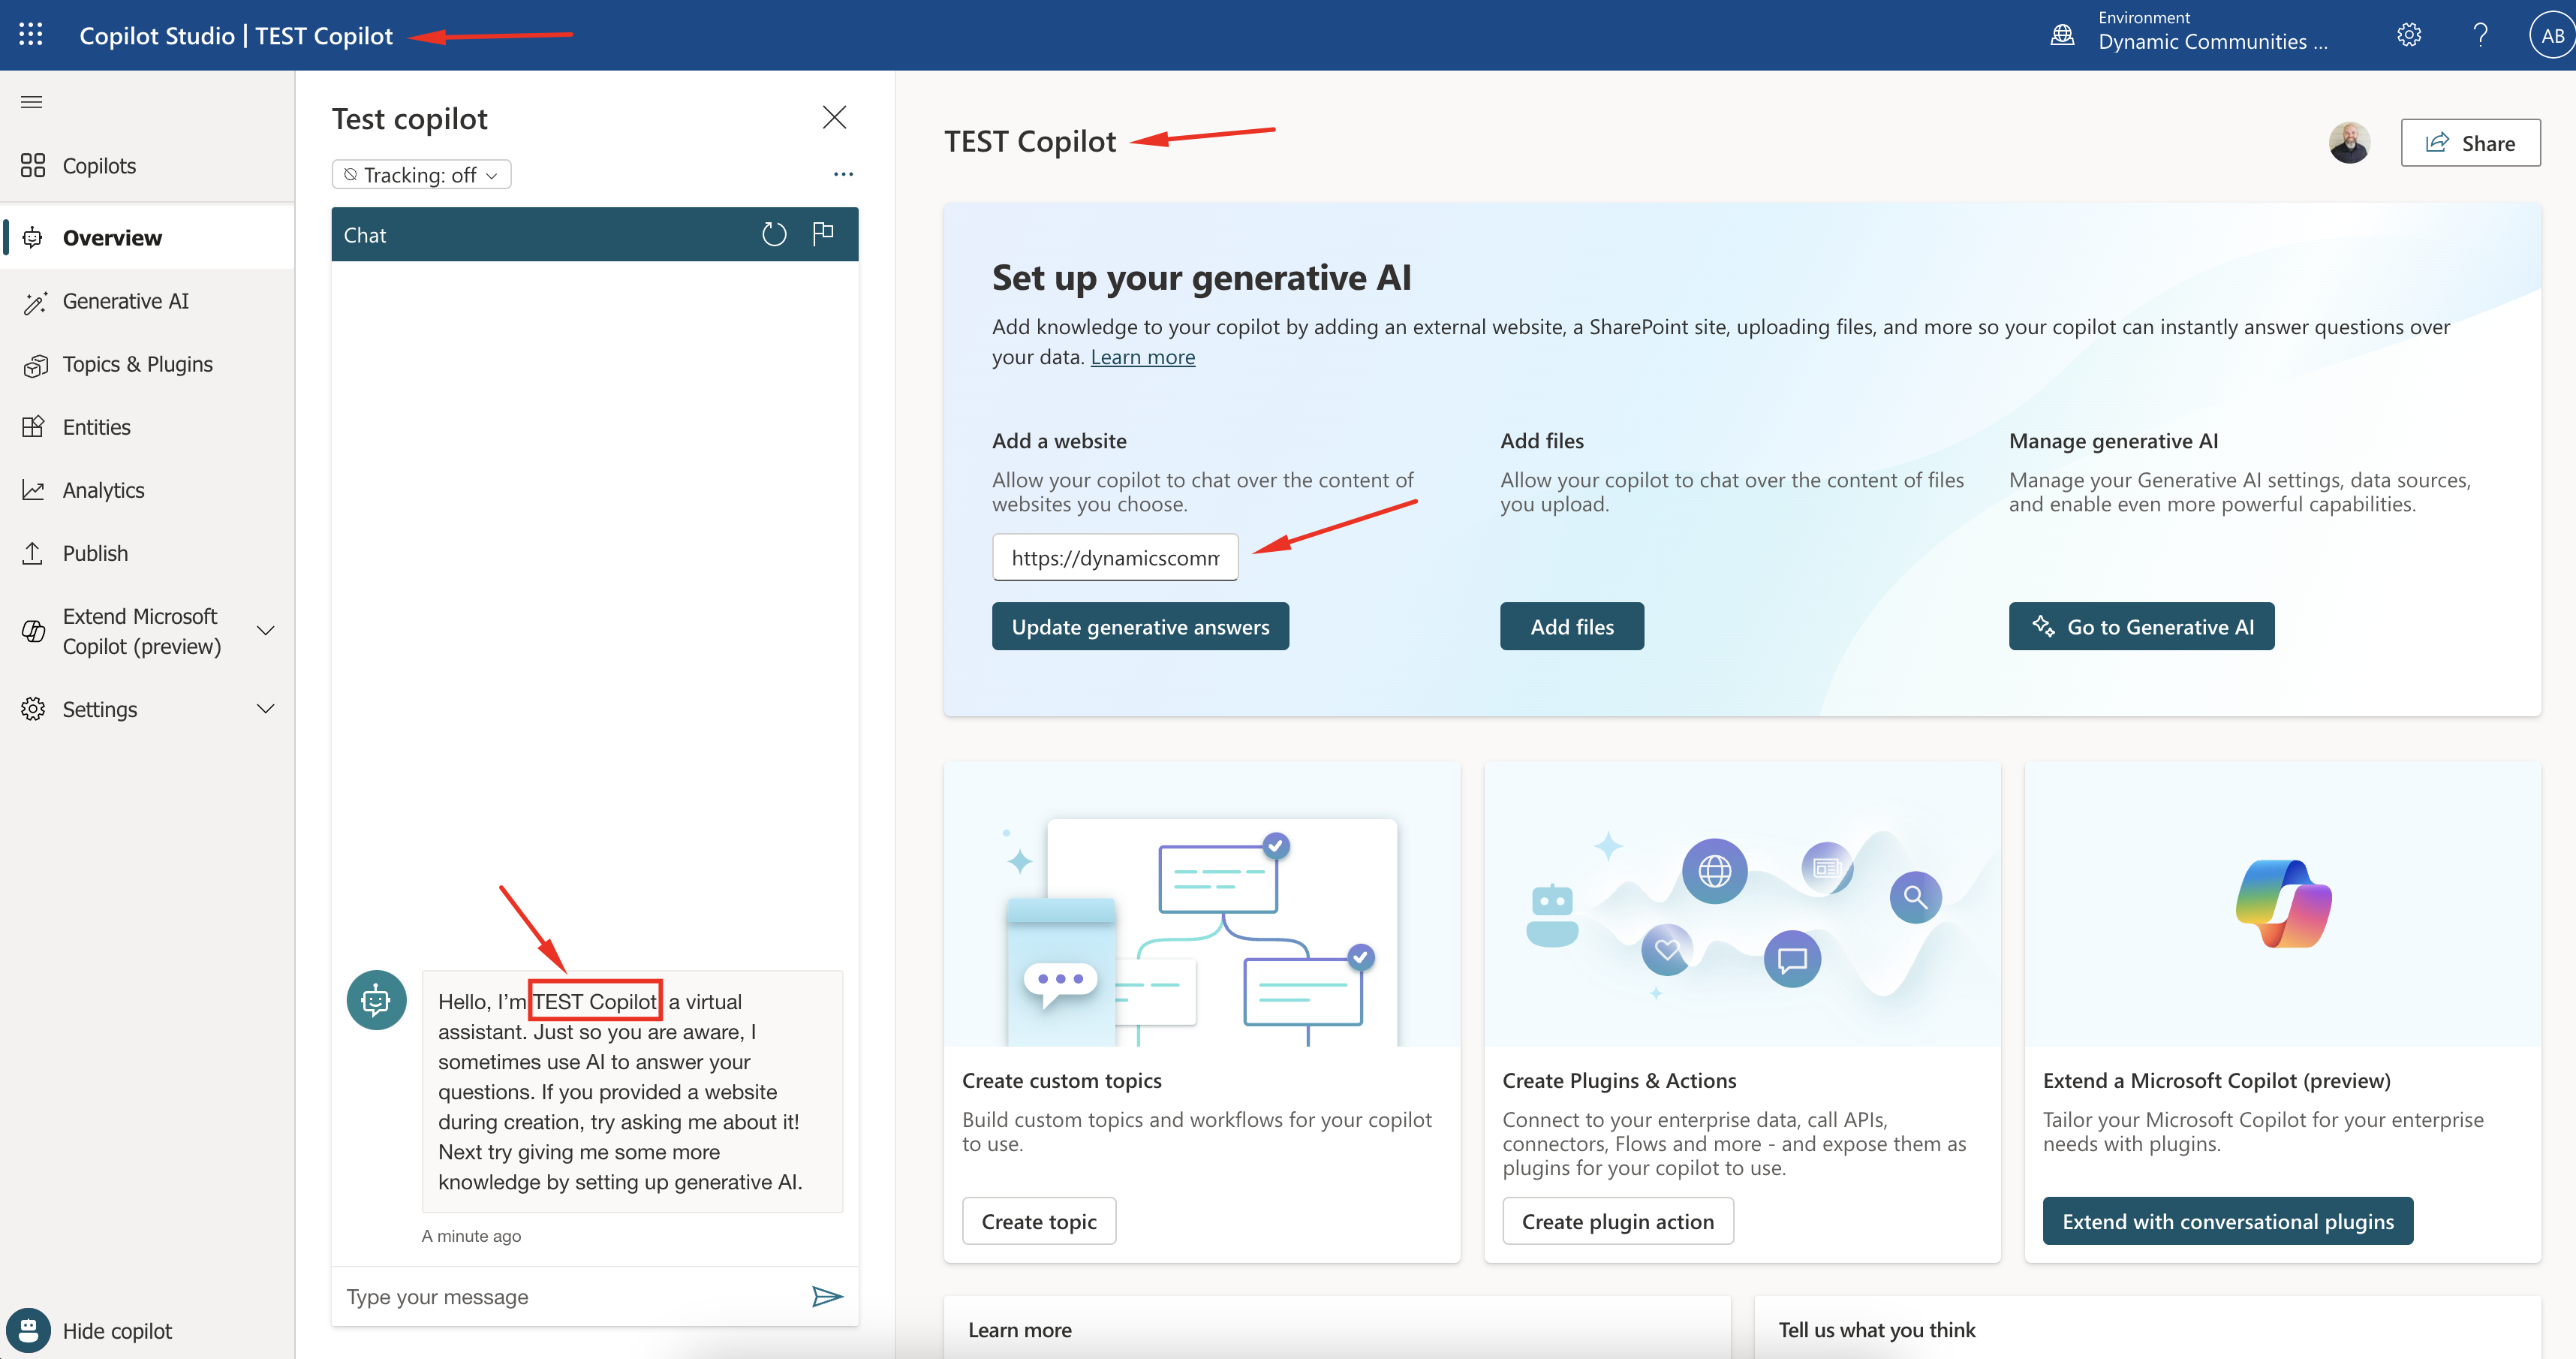
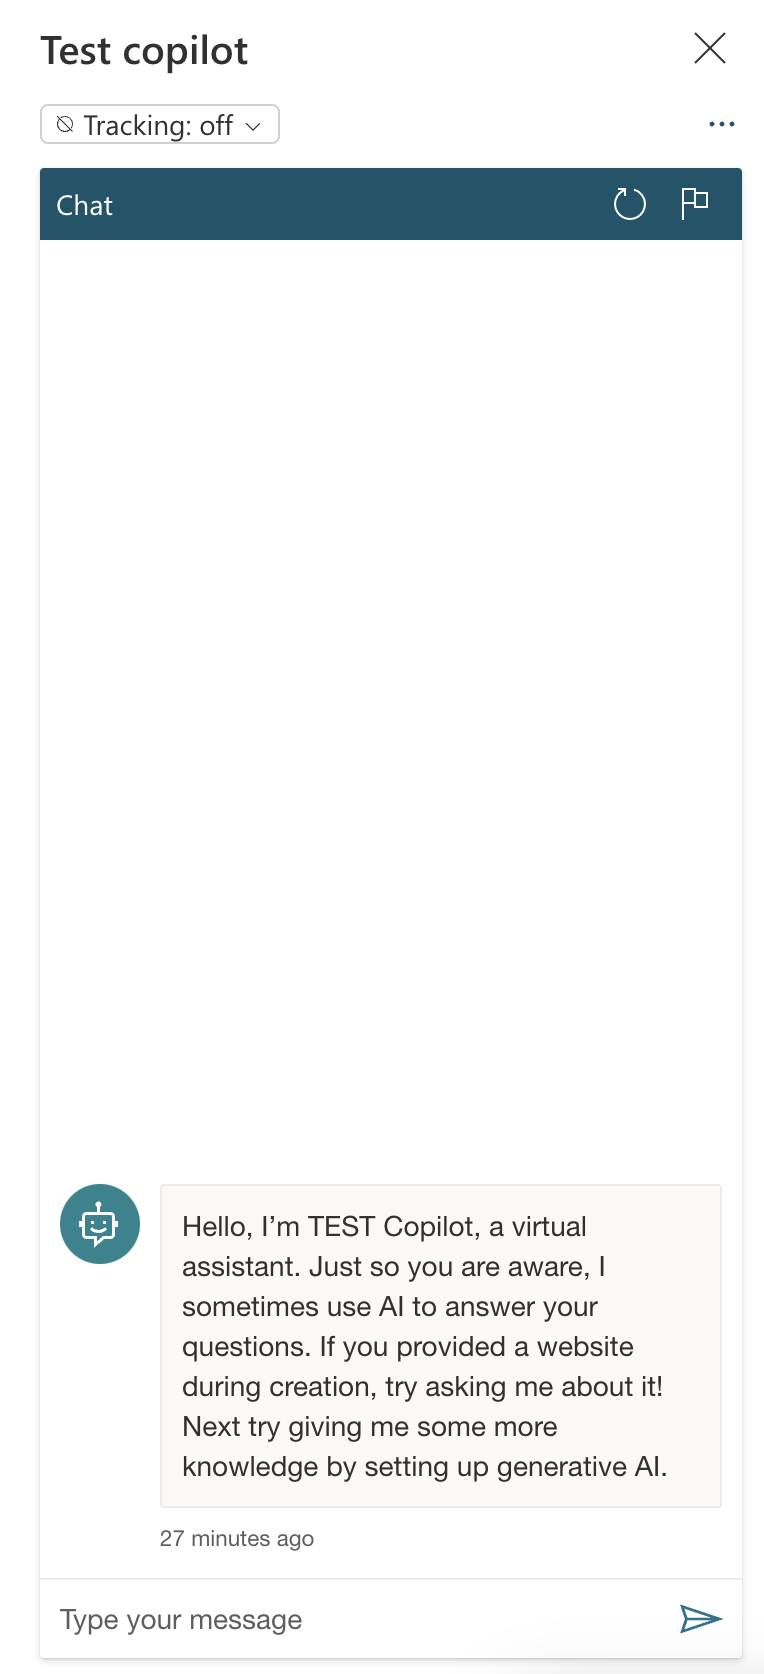
Along the left side, to the right of the menu, the Copilot chat panel is displayed. This is where you can test your setup, see the generative AI responses, and more.
Generative AI Area
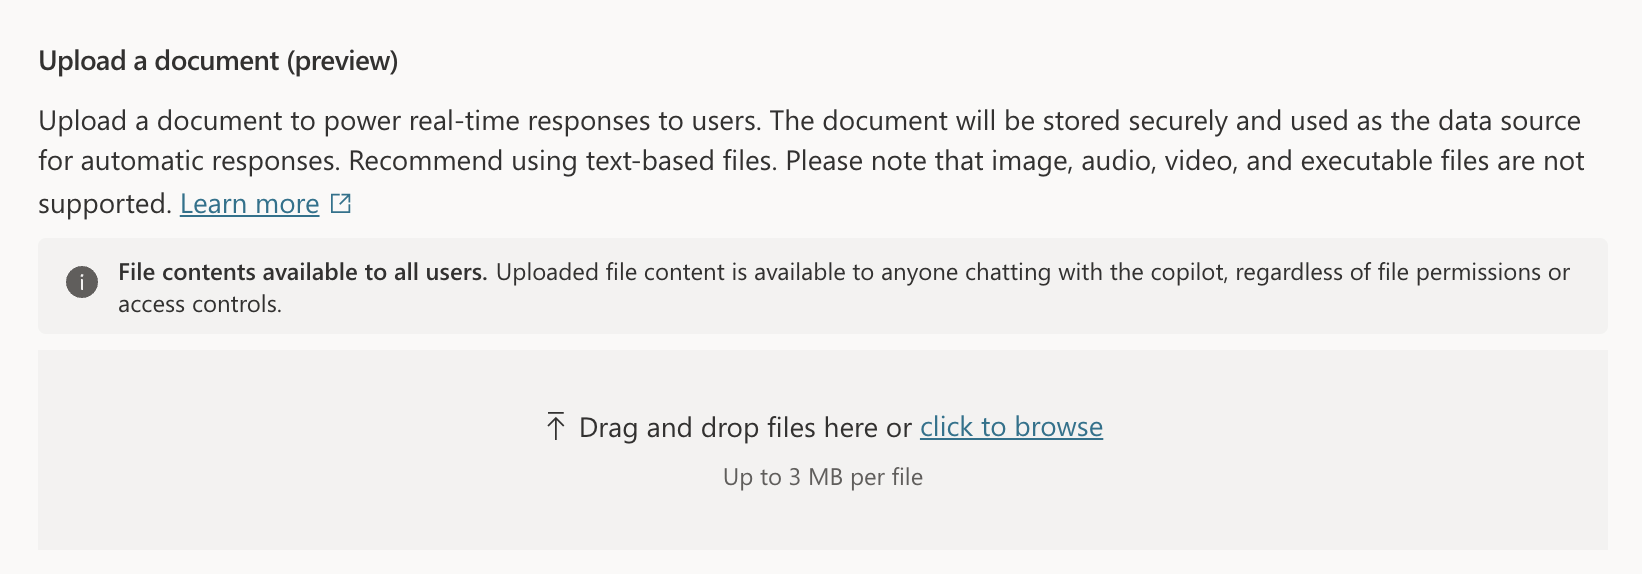
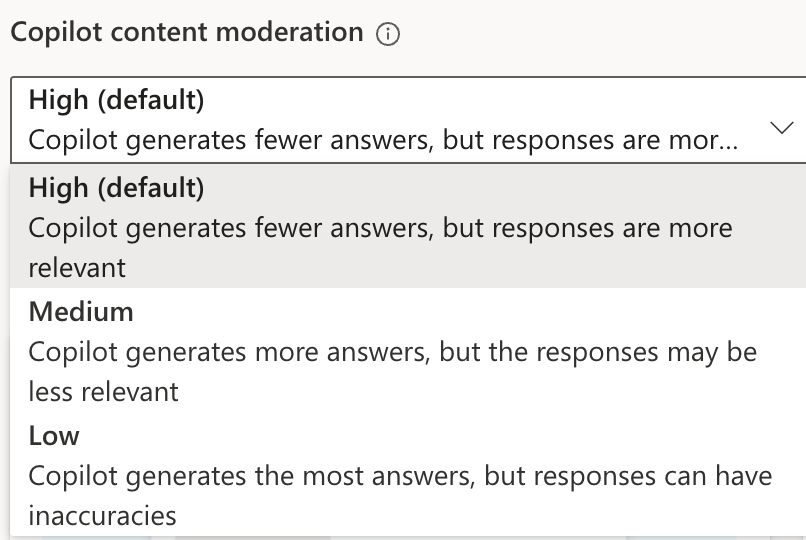
The next area to note is the Generative AI area. This is where you can do several things:
Add more websites:
Upload a document with responses:
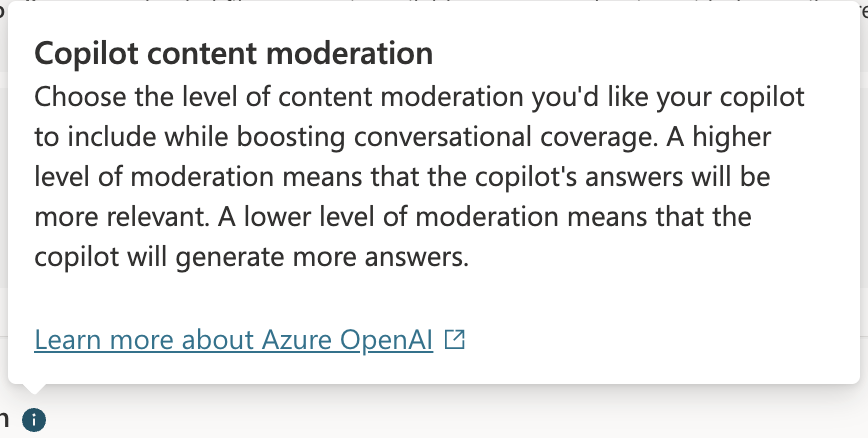
Adjust the content moderation:
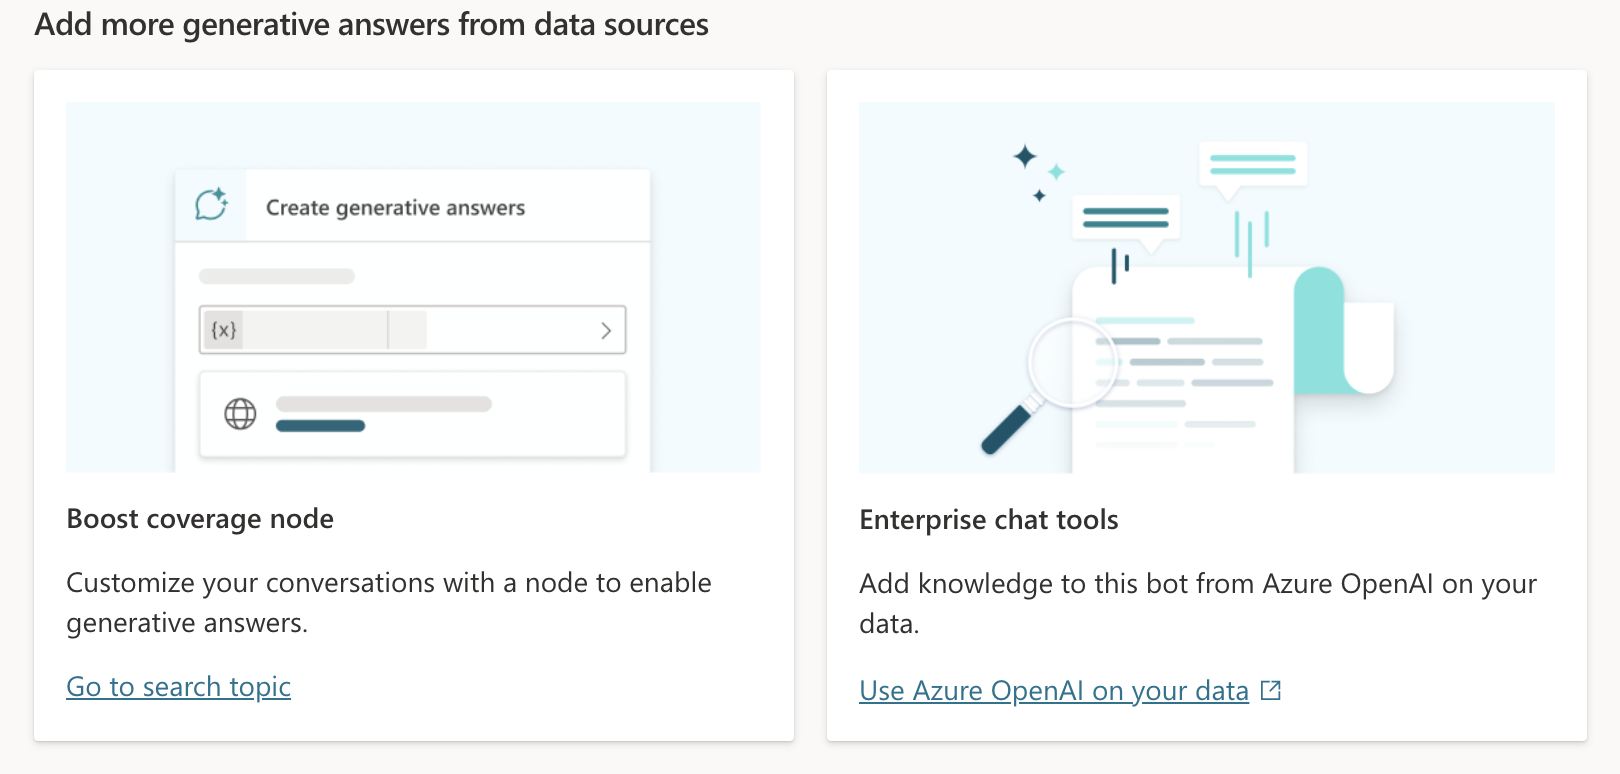
Add more generative answers:
!! Important note: I would highly recommend reviewing this section and the linked details about data flow and responsible AI to ensure this complies with your company’s data and AI governance policies. !!

- Preview terms: https://go.microsoft.com/fwlink/?linkid=2189520
- Responsible AI: https://go.microsoft.com/fwlink/?linkid=2224230
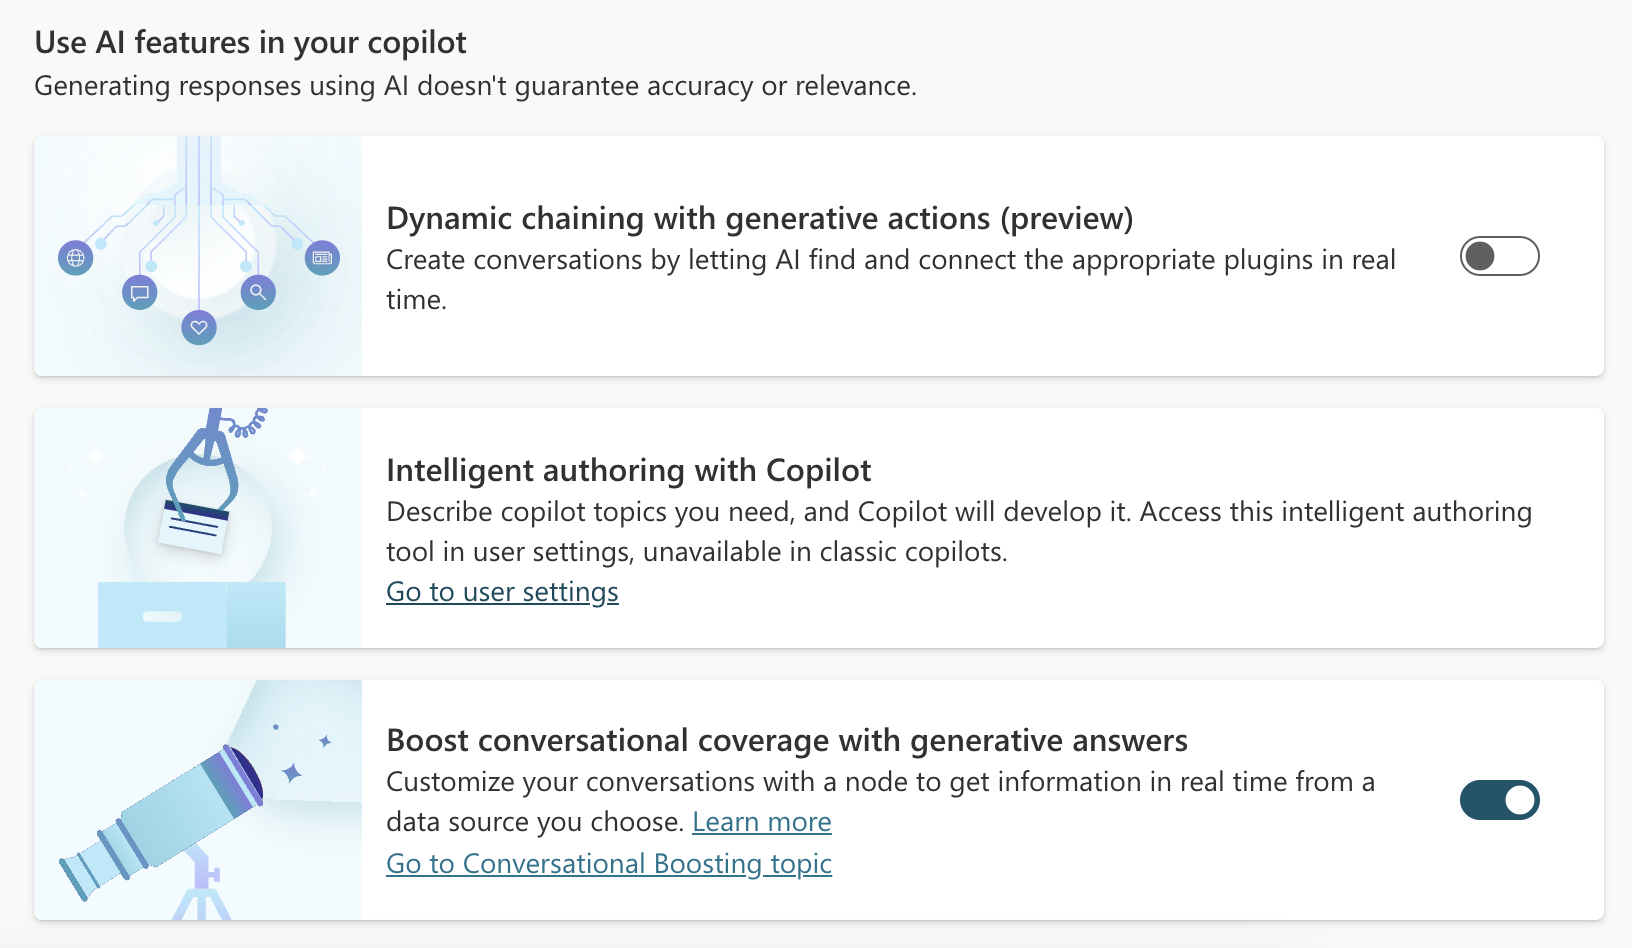
Toggle additional features:
Topics and Plugins Area
The next area is the Topics and Plugins area. This is where you can:
- Create Topics
- According to Microsoft documentation, “a topic represents some portion of a conversational thread between a user and a copilot.”
![]()
![]()
- Create Plugins such as Power Automate Flows or Actions
- View System Plugins:


Note: For this post, I will focus briefly on creating and editing a Topic. I will cover Plugins and Actions later.
Creating a Topic
You can create a Topic from two different methods.
- From blank – this means you start from scratch and need to define all the steps.
- From a description – this means AI will assist you in creating the topic.


First, I chose the “Create from description” option so that the AI assistant could help me get started. I named it “Copilot Content – Dynamics 365, Microsoft 365, System Administration” and described the intent of the copilot.
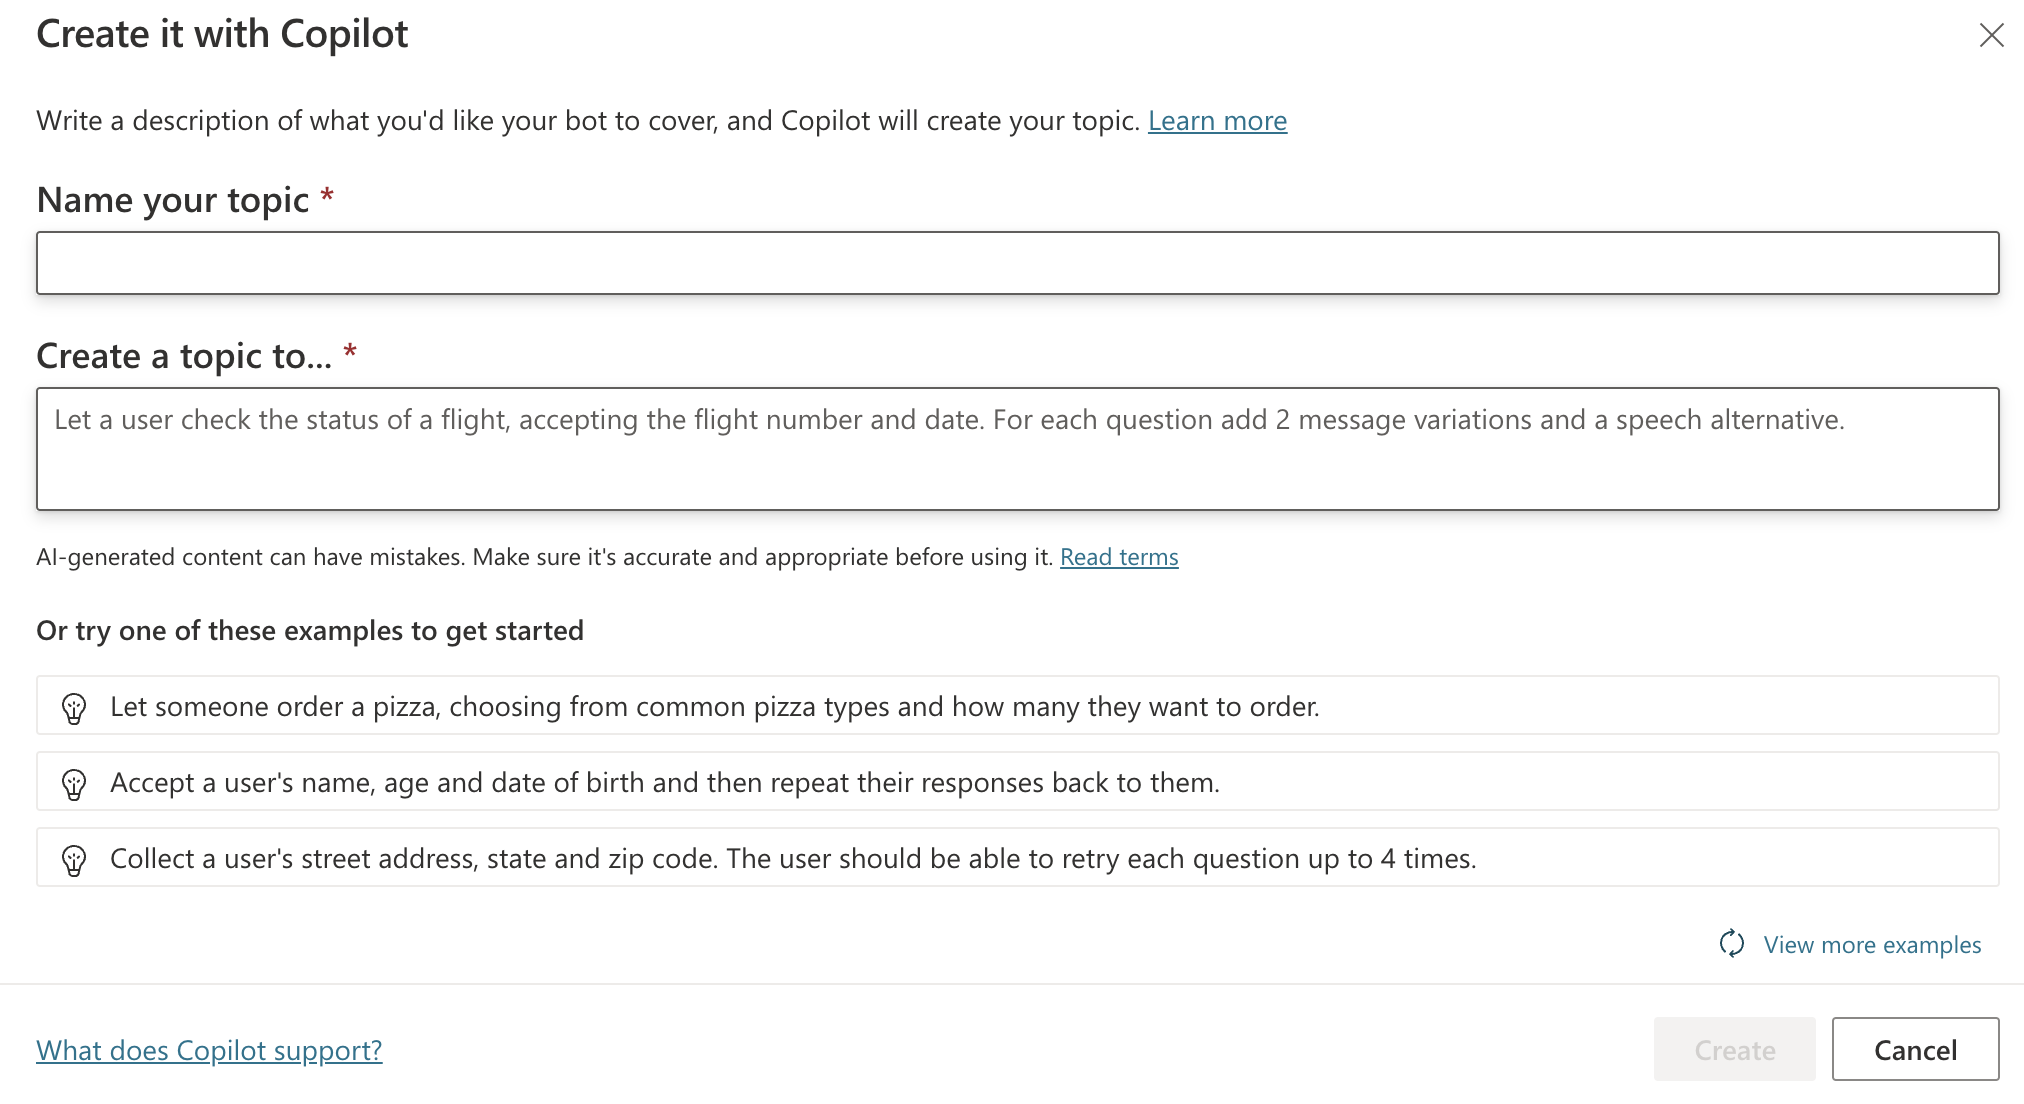
What it generated was:
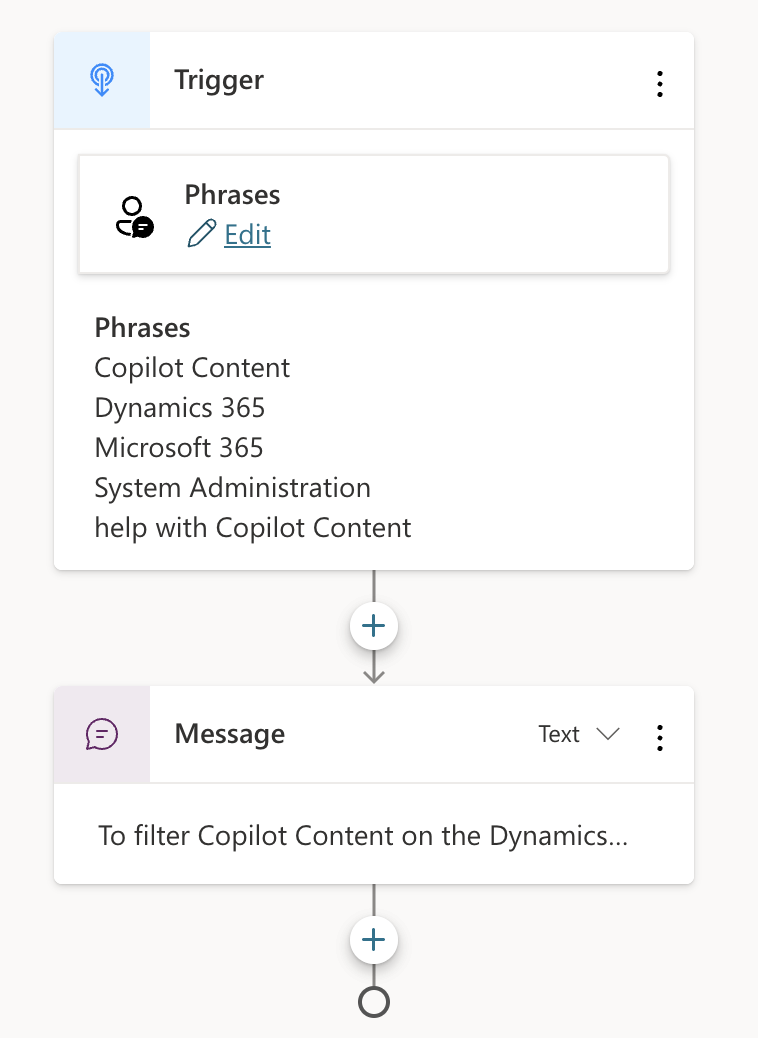
- A Trigger step that contained multiple Phrases.
- A Message step with auto-populated text.
![]()
- I wasn’t satisfied with the message, so I updated it slightly.
![]()


Note: After reviewing this, editing, or adding additional steps, be sure to save your work!
Let’s test the topic that was just created by using the Chat panel and see what the output is.
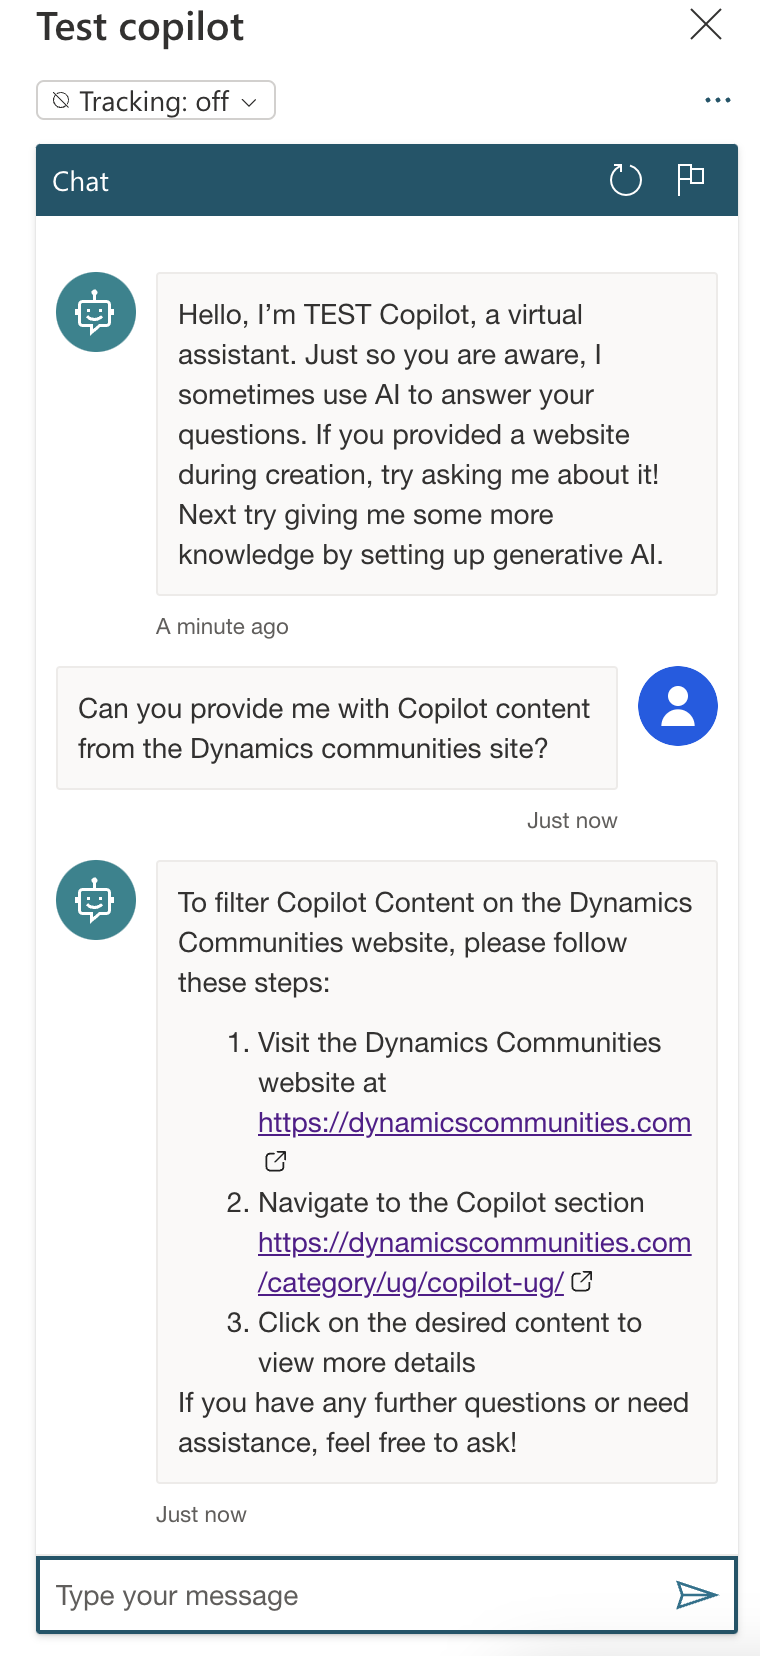
As you can see, the response contained the text and links from the Message step. The links are clickable and will direct the user to the appropriate sites.
If you would like to use the “from blank” option to create a Topic, you can do this but will need to create and update each step. You can achieve the same outcome, but it will mean additional work on your part.
Closing Thoughts
Yes, there is a LOT more to cover with Copilot Studio, but I wanted to help you get started easily so that the process doesn’t seem overwhelming. However, I will be creating more Copilot posts where I will dive deeper into some of the areas above.
What I’m finding is that the innovation you can create with Copilot is awesome! With that in mind, I would love to hear from you about what you created, the challenges you were presented with, and how you used Copilot to deliver helpful outcomes. Even better, if you could share what DIDN’T work and what DID work, that would be very beneficial to this community.
The post What You Should Consider When Getting Started with Copilot Studio appeared first on Dynamics Communities.