
In Business Central 24, Microsoft has supersized the Project.
You may be wondering what a Project is in terms of Business Central. Microsoft has renamed the Job. It’s now called “Project.” Do not worry – you can still search Job and find your Projects.
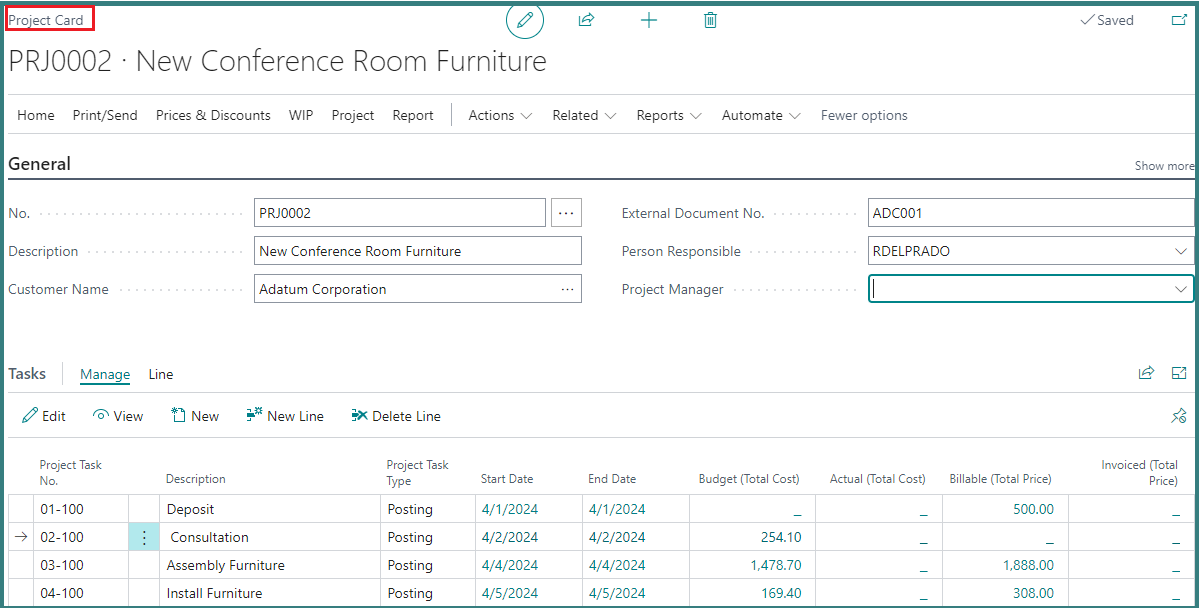
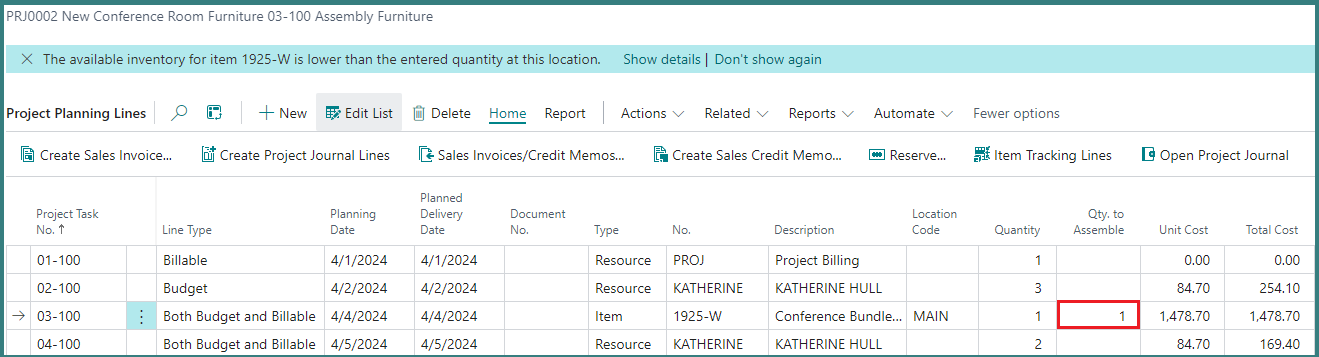
Below is the retitled Project Card, and in this example, we have a Billable task line for the deposit, a Budget Only task line for Consultation, and two Both Budget and Billable task lines for the assembly and installation of the furniture.
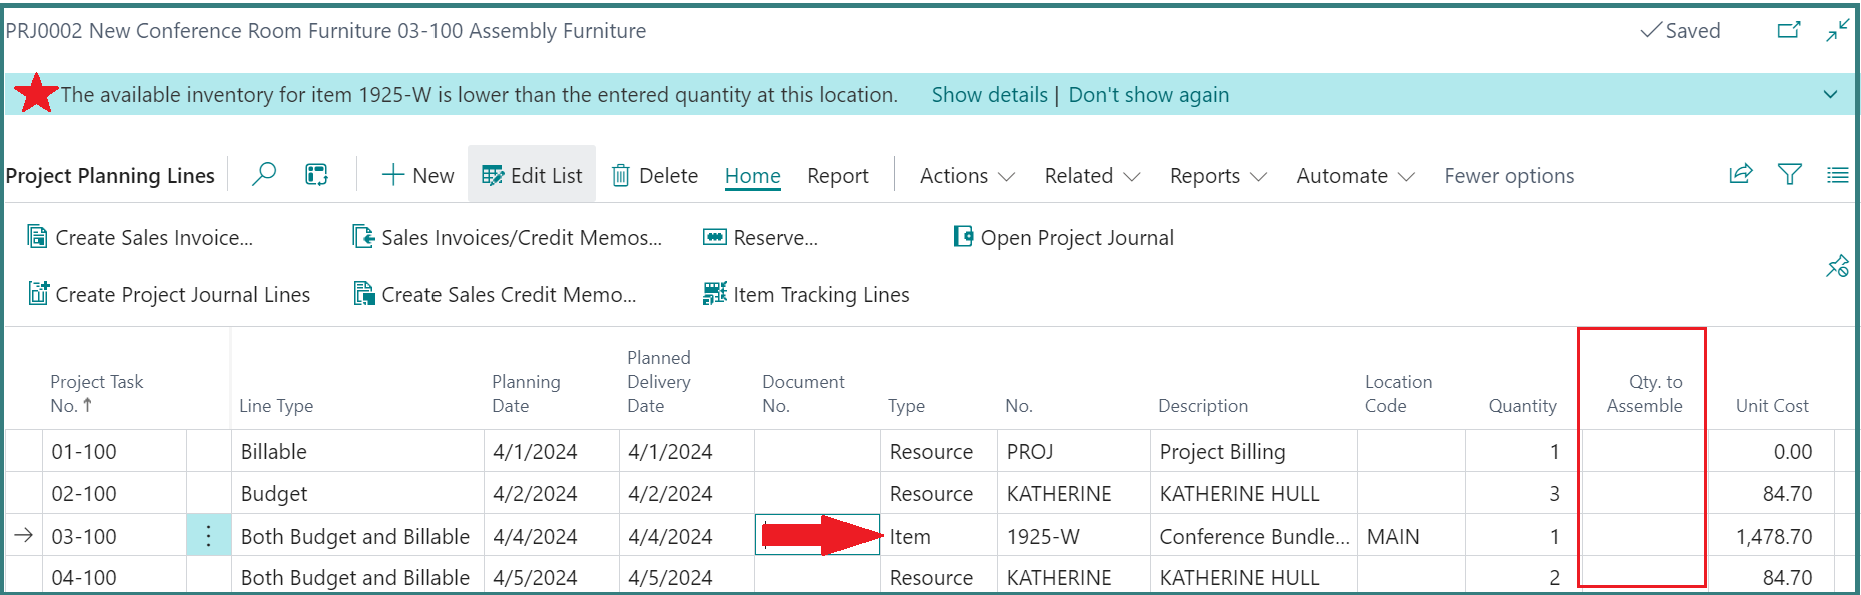
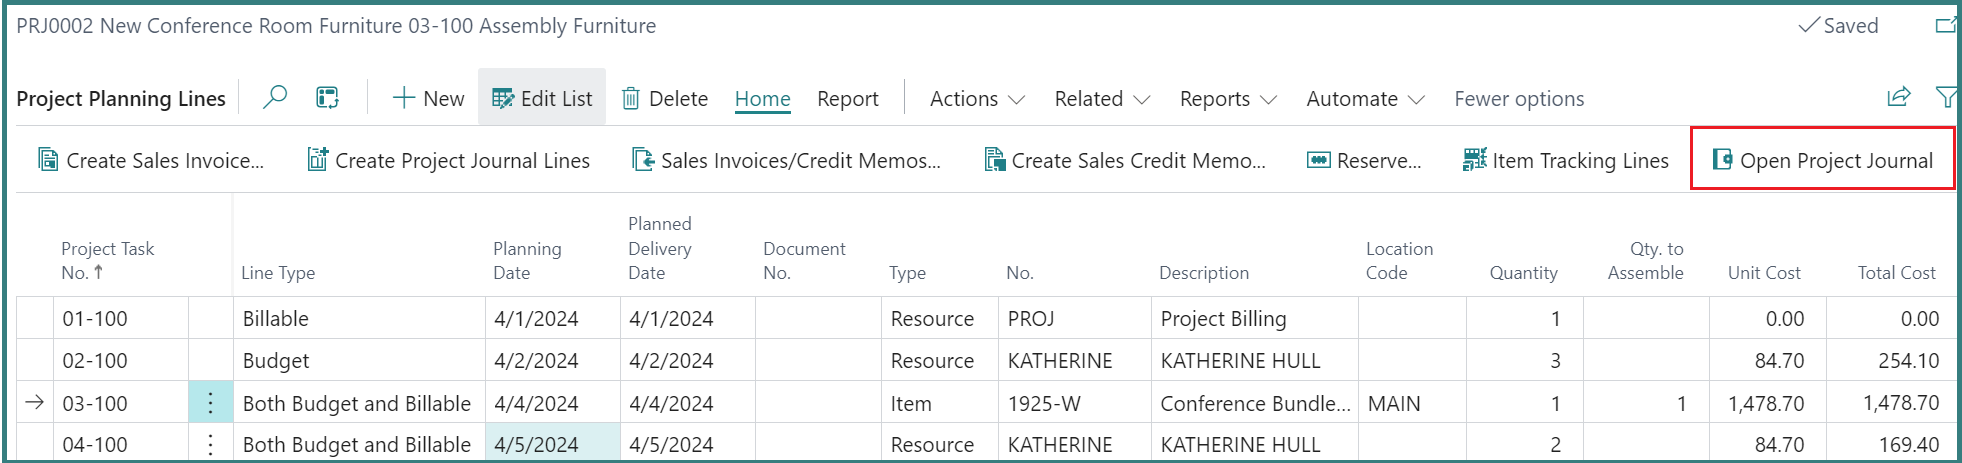
Project Planning Line
Looking at the Project Planning Lines for the Project, we see Item 1925-W is a Conference Bundle and we see the column “Qty. to Assemble.” That field has been added in Business Central 24.
We also see that our availability for Item 1925-W is lower than the quantity entered for the Location.
Before we explore how this new field works, let’s take a closer look at Item 1925-W.
The Item Card
From the Replenishment tab, we see Item 1925-W is an Item replenished through an Assembly Order and the Assembly Policy is Assemble-to-Order.
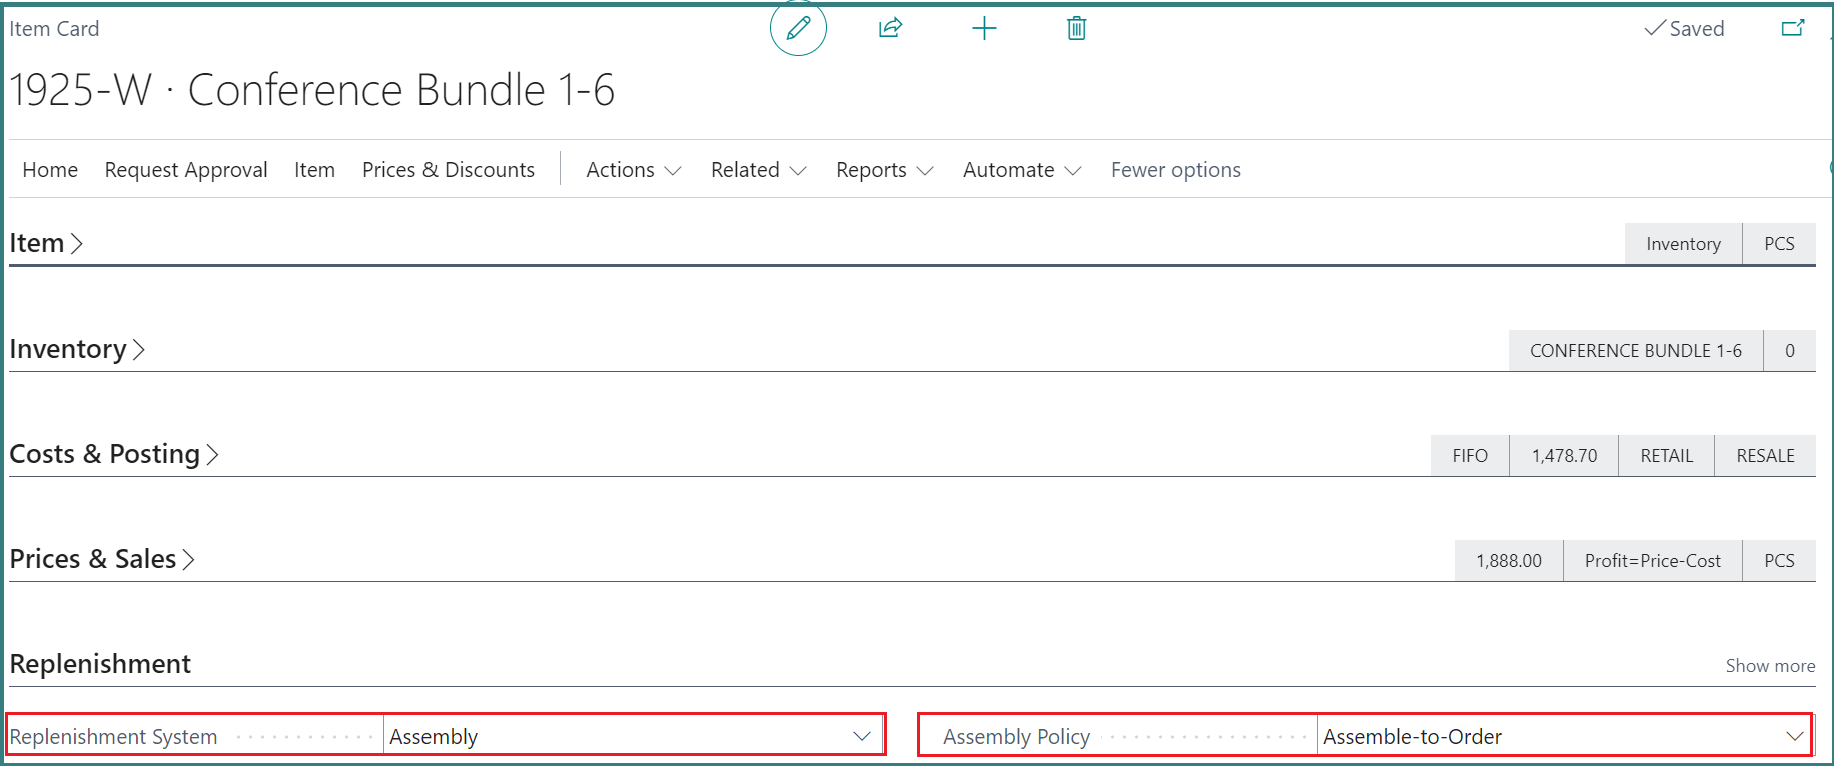
That indicates there is an Assembly BOM.
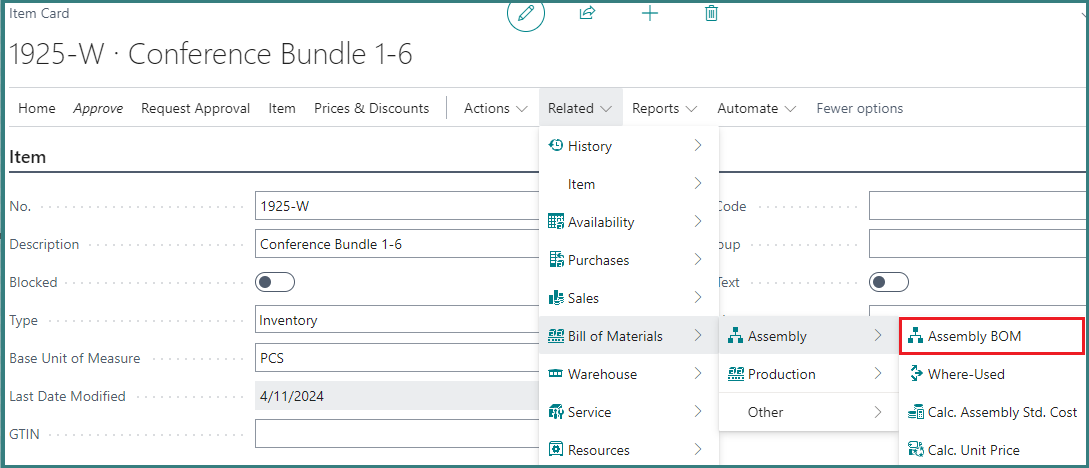
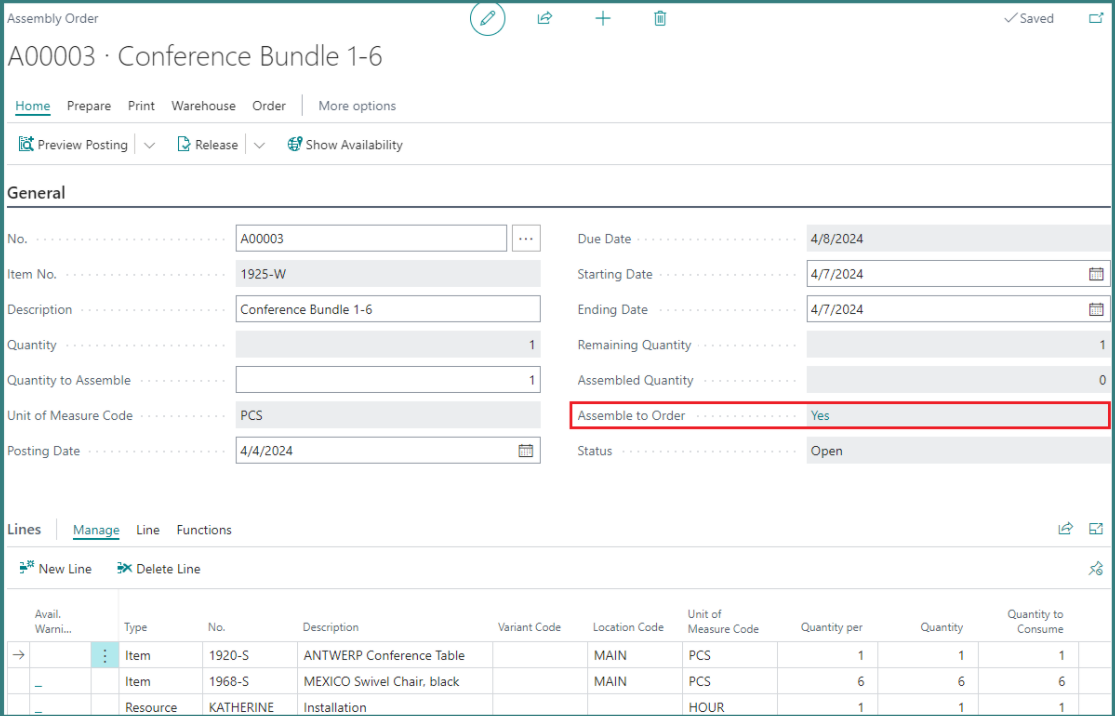
If you have not personalized the Item Card, the Assembly BOM is three options deep under the Related button. The Assembly of Item 1925-W requires one of Item 1920-S, six of Item 1968-S and an hour of Katherine’s time for the assembly.

Returning to the Project Planning Line, when you enter a quantity into the “Qty. to Assemble” field, it will auto-create an Assembly Order.
But the creation of an Assembly Order does not fulfill the demand for the Project. The demand will not be fulfilled until the Assembly Order is processed.
Reviewing the Assembly Order, it shows the components of the Assembly BOM on the lines of the Order.
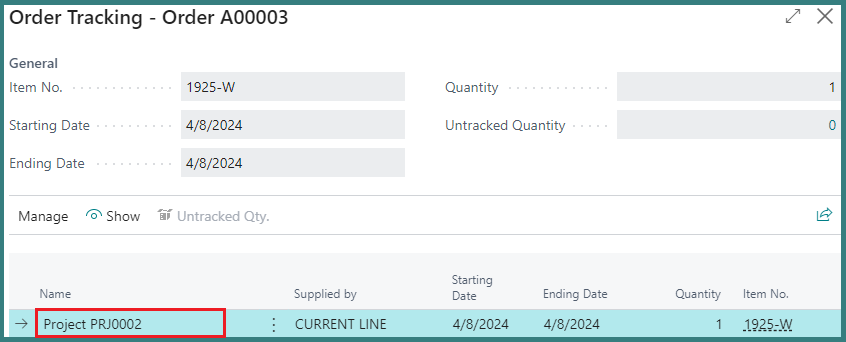
To see what where the demand is for the Assembly Order we can either drill into the “Yes” in the Assemble to Order field or select the “Order Tracking” option from the Order button on the Assembly Order.

You cannot modify the quantity on the Assembly Order that is created from the Project Planning Line, and you cannot delete the Assembly Order using the Trash Can on the Assembly Order.
When the Assembly Order is created, its status is set to Open.
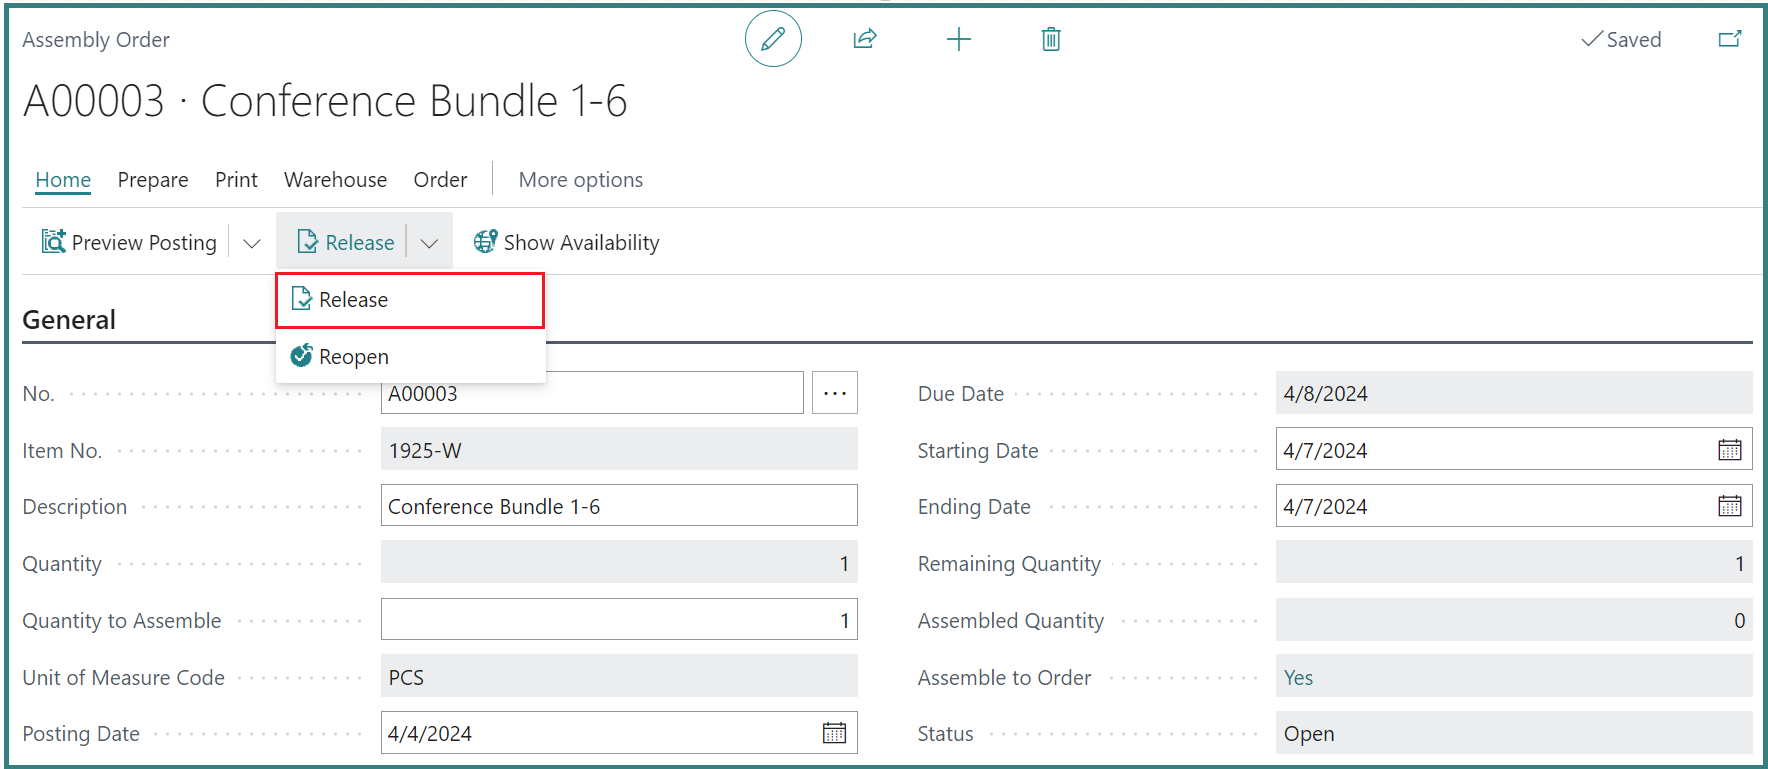
You can change the status to Released by using the “Release” option under the Release button on the Assembly Order.
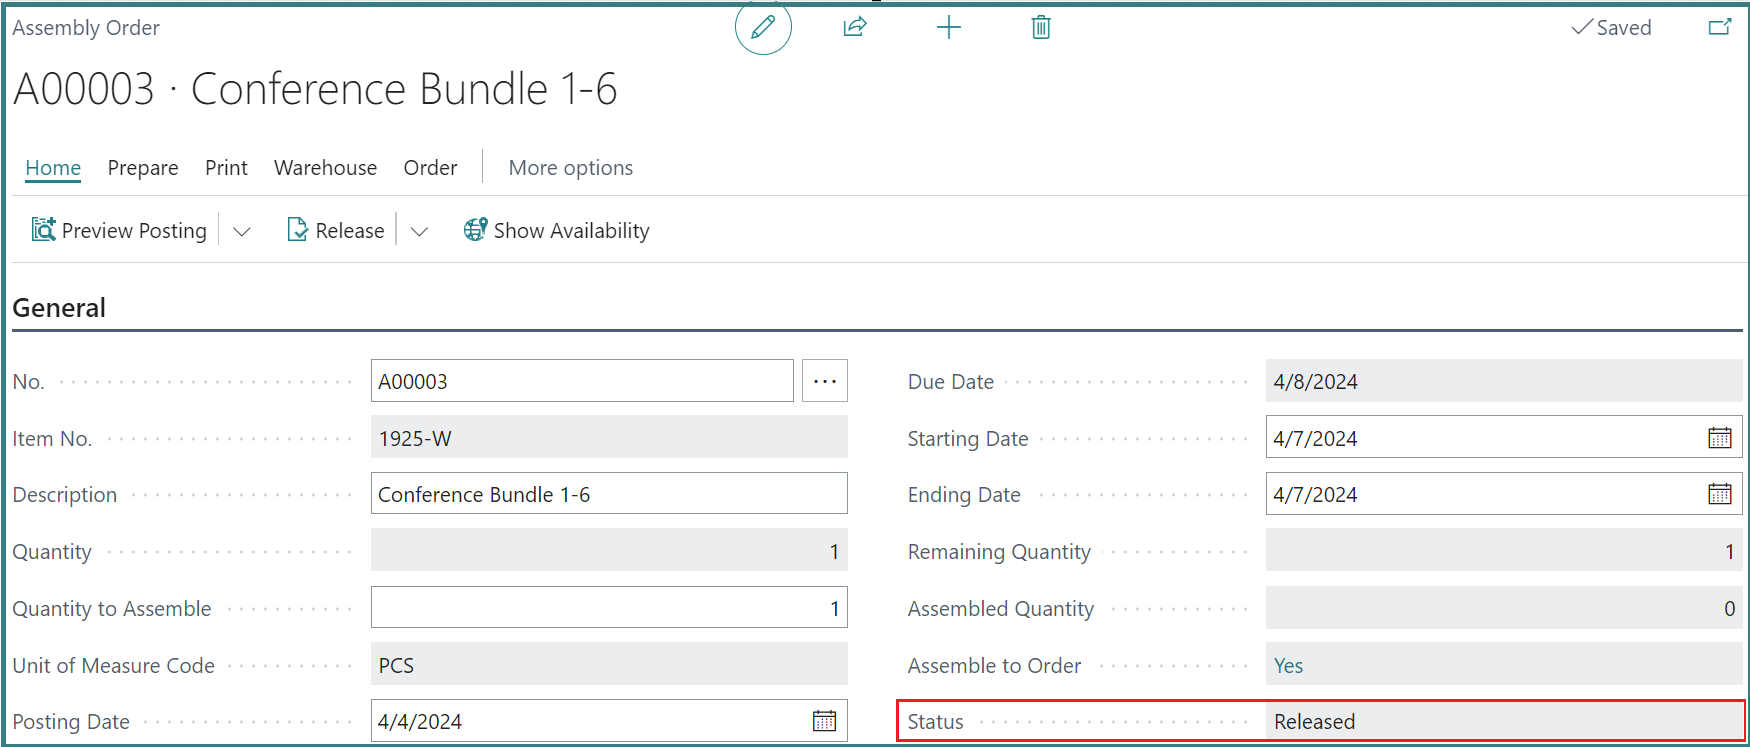
However, if you change the quantity in the “Qty.-to-Assemble” field on the Project Planning Line it will update the quantity on the Assembly Order even if the Assembly Order has been released.
Further, if you remove the quantity in the “Qty.-to-Assemble” field on the Project Planning Line it will delete the Assembly Order even if the Assembly Order has been released.
Processing the Assembly Order for the Project
We need to process the Assembly Order to complete the Project, but this is an “Assemble to Order” Assembly Order, so you cannot post the Assembly Order.
Returning to the Project Planning Lines, you see what appears to be two options: “Create Project Journal Line” and “Open Project Journal.”
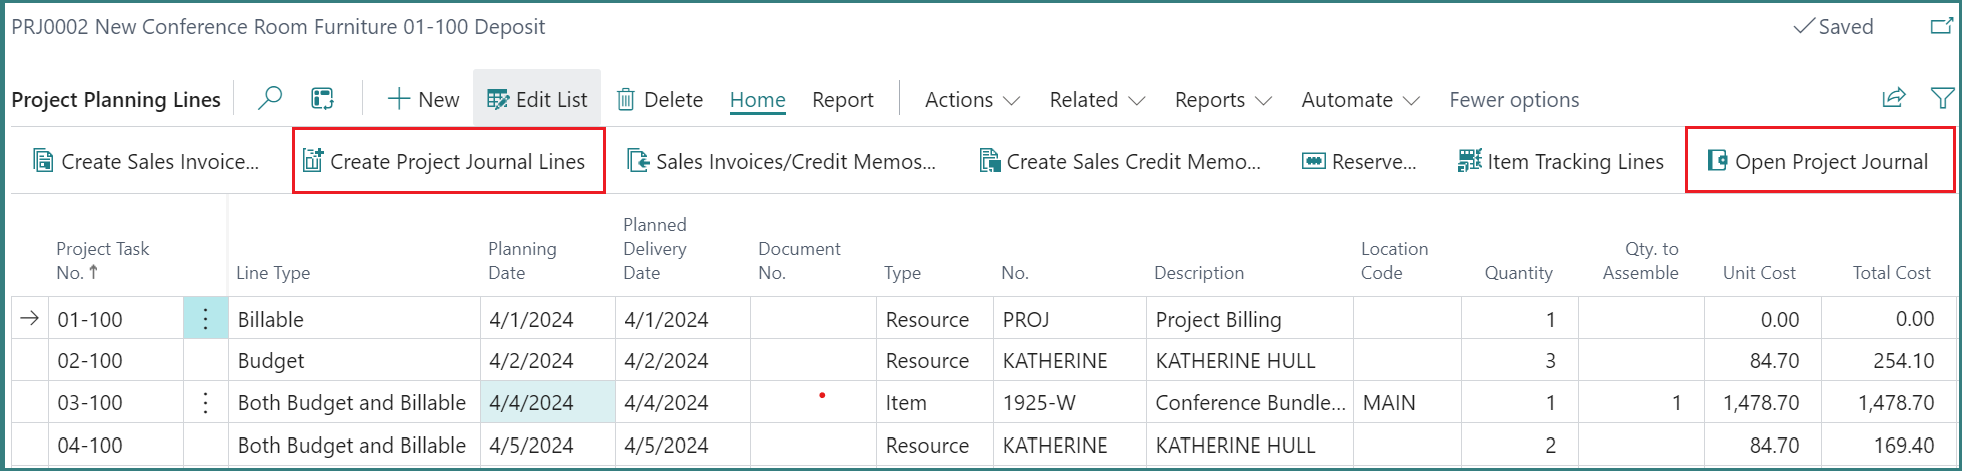
You might think by using the “Open Project Journal”, and the “Calc. Remaining Usage” option would allow you to process the Assembly Order.
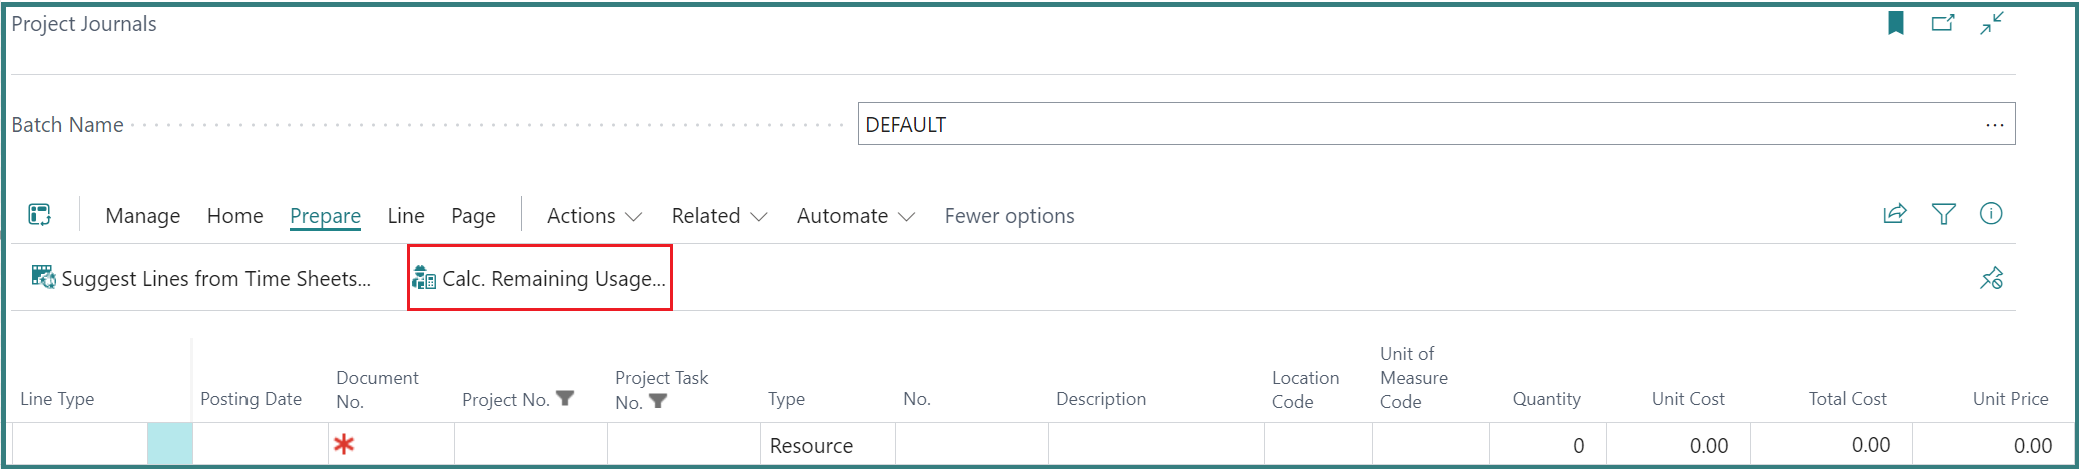
However, using this option does not link the Assembly Order to the Project Journal.
Only using the first option, “Create Project Journal Line” will create the Project Journal Line with the link to the Assembly Order.
When you are focused on the Project Planning Line with the quantity in the “Qty to Assemble” field and you select the “Create Project Journal Line”, the Project Journal is created with the link to the Assembly Order.
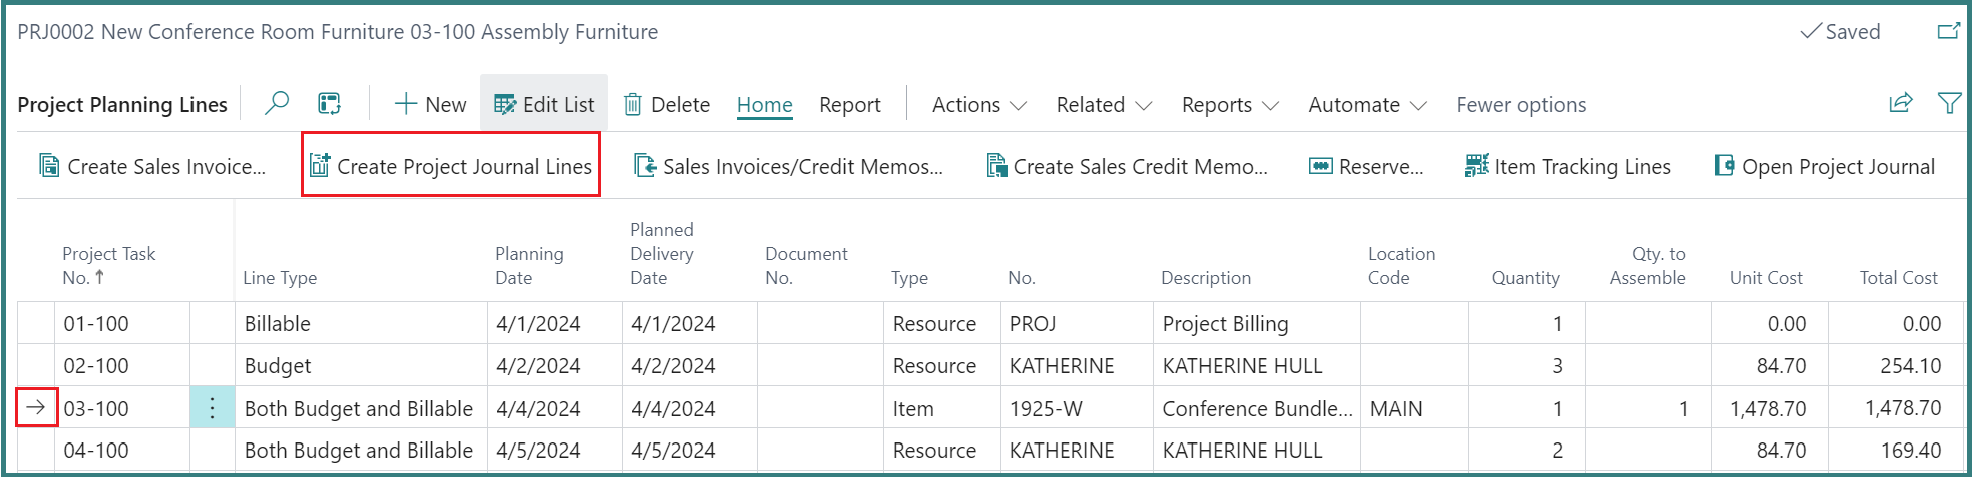
This will bring up the request form that allows you to select the Project Journal Template and Project Journal Batch.

Now from the Project Planning Lines you can select the “Open Project Journal.”
The Item has been transferred to the Project Journal from the Project Planning Line with the link to the Assembly Order.
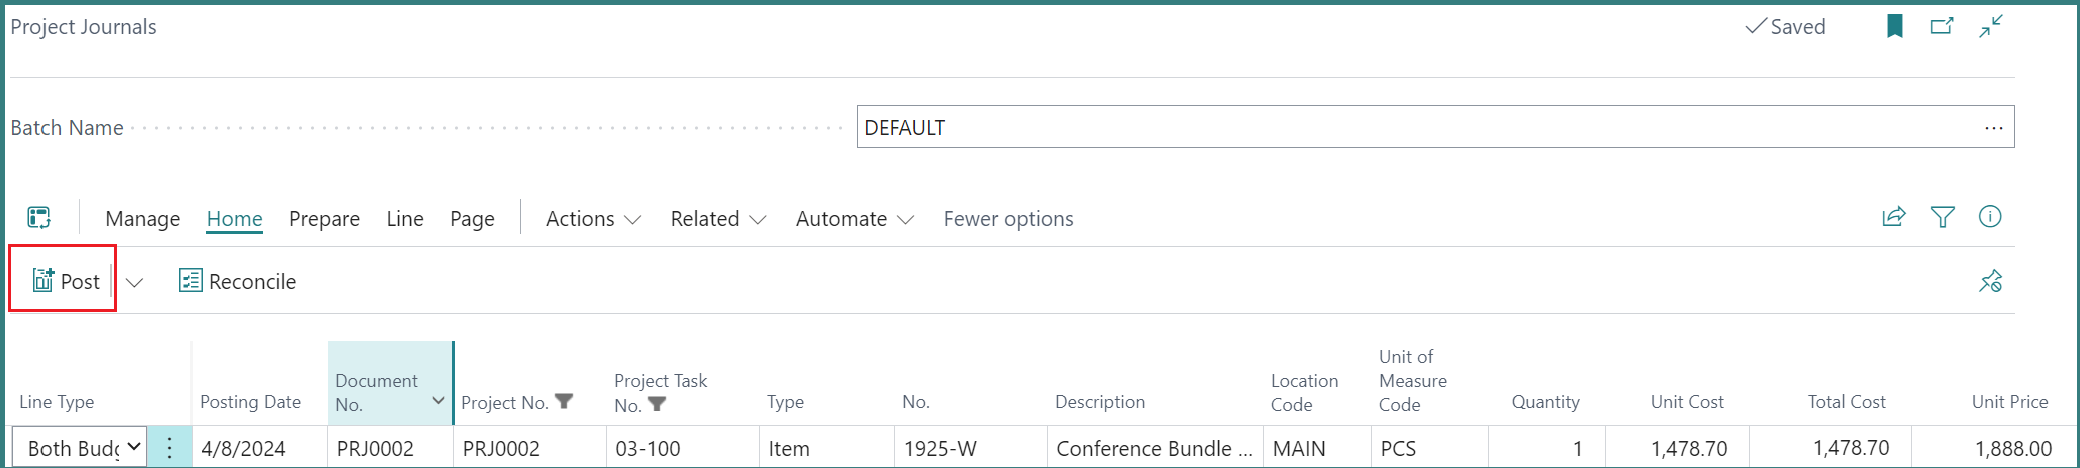
Posting the Project Journal will post the Assembly Order and update the Project’s actual costs.
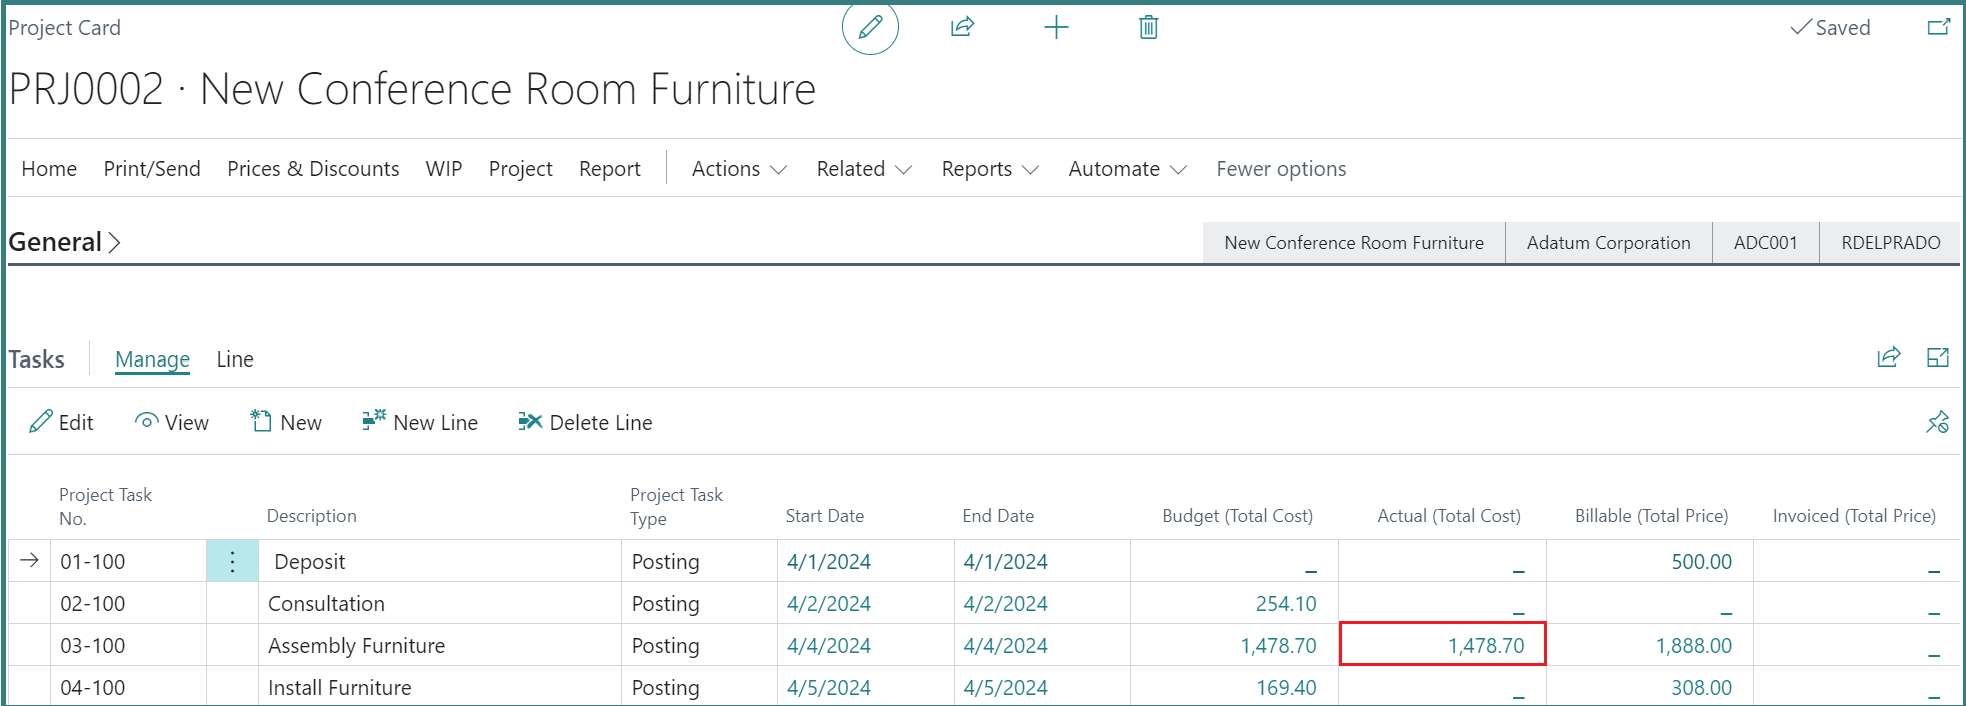
Now that the Assembly Order has been processed, you can complete the remaining tasks for the Project and invoice the customer.
As a reminder, if you do not know how to start your implementation of Projects in Business Central or you just want to utilize more functionality with your Projects, send me an email.
The post The Project Card in Business Central appeared first on Dynamics Communities.