In this post, I will show you how to use Power Automate to craft a flow to create a lead from a form submission. There are many connectors available to create forms you can use. In this walkthrough, we use the Gravity Forms connector (one of the most popular form plug-ins on WordPress and the one that I use). You can use the form connector of your choice, as long as it has a trigger for when a form is submitted.
We will be using three connectors to build this flow.
- Dataverse
- Gravity Forms
- Control
The Full Flow
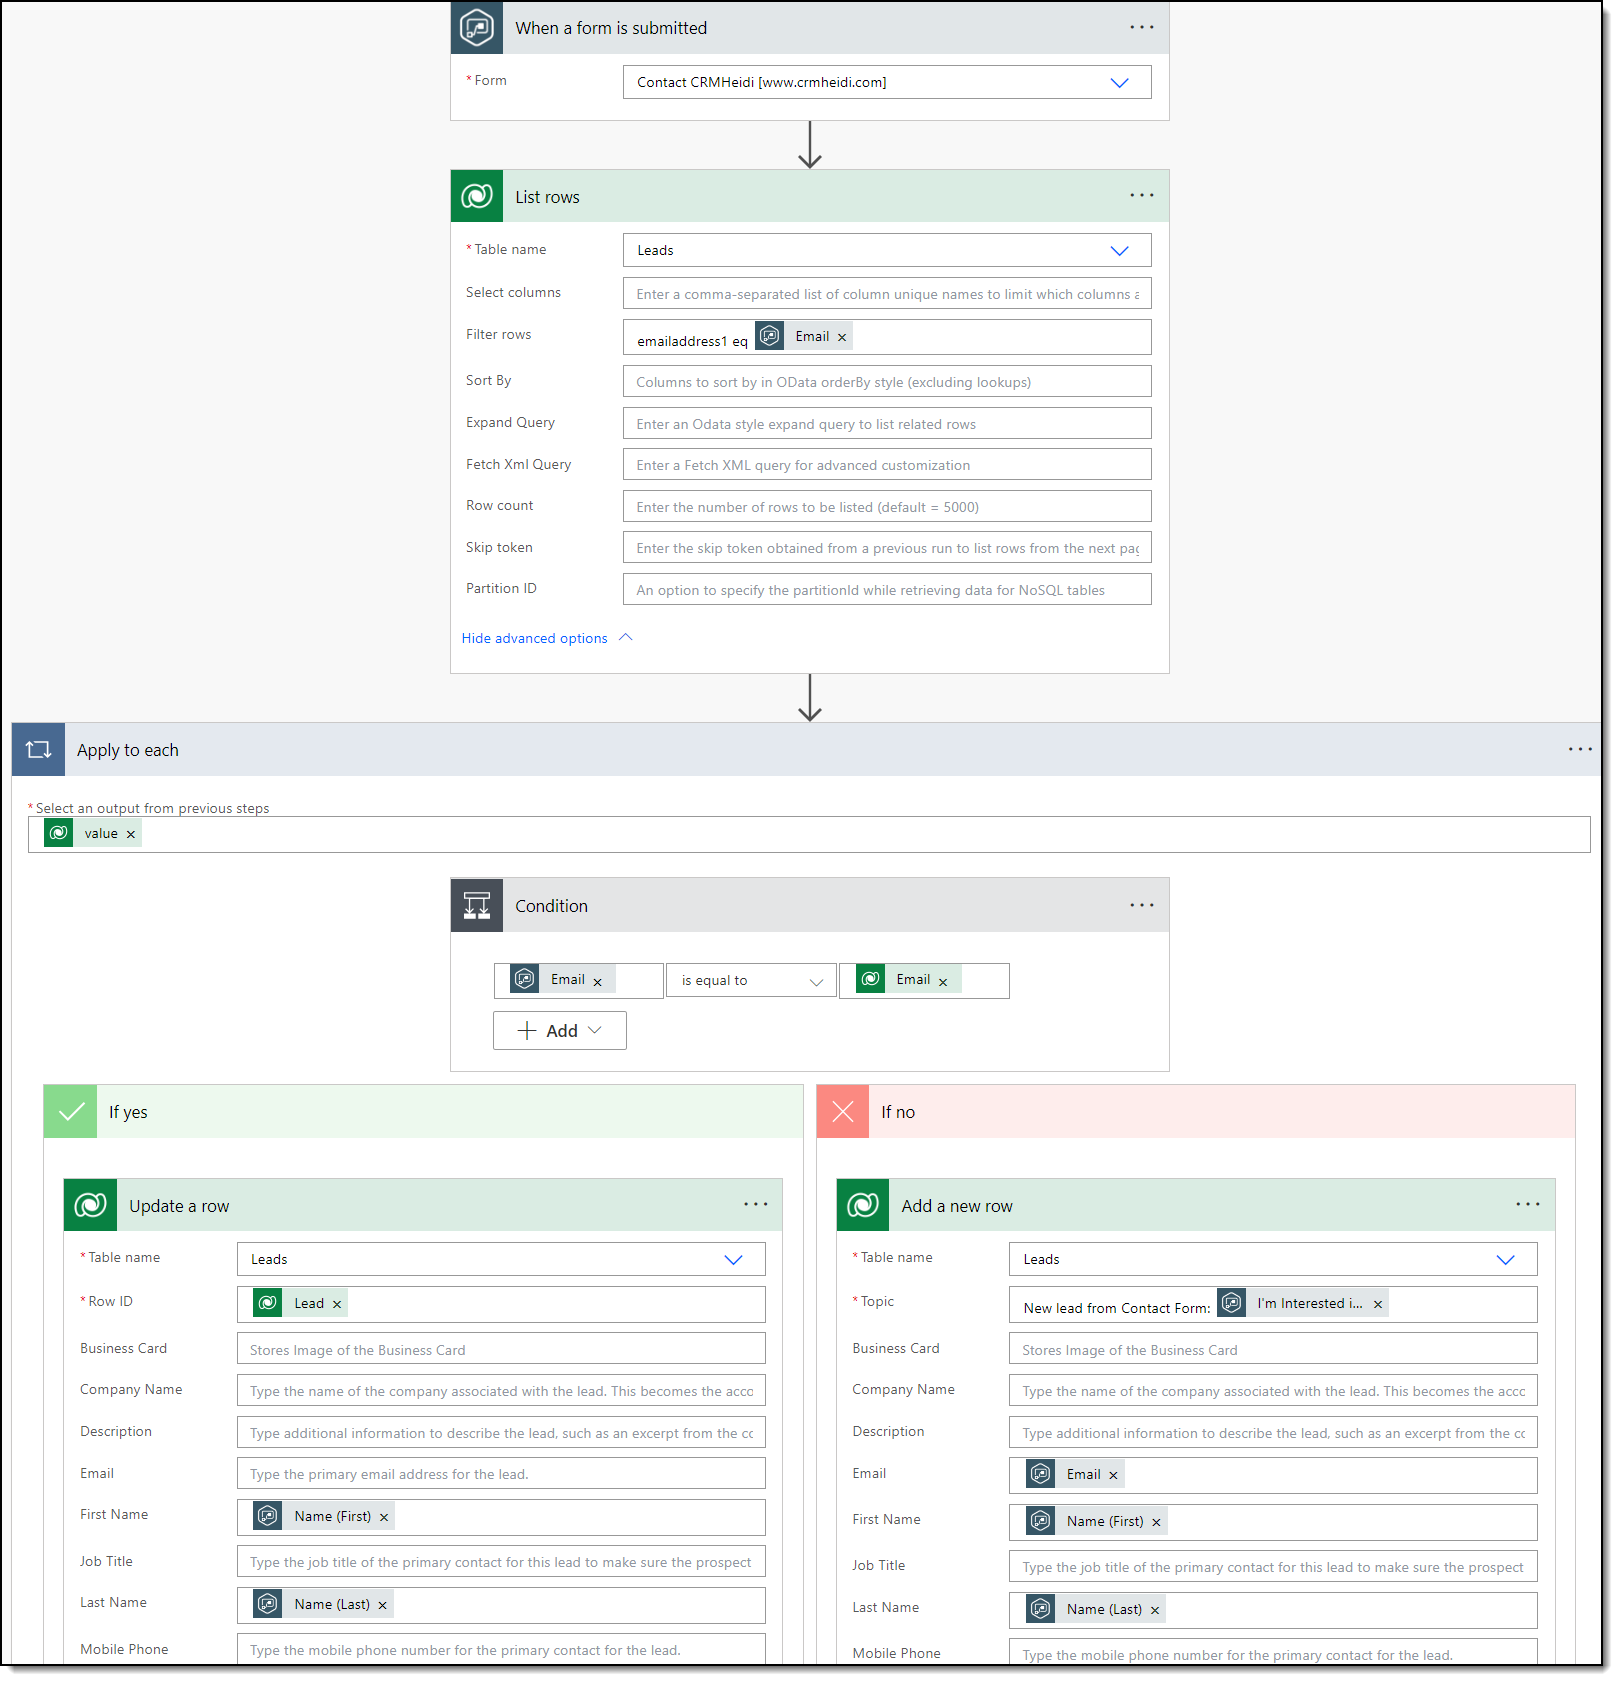
Here is the full automation we will build over this tutorial:
Configure the Trigger
1. Select an automated cloud flow.
2. Name your flow and choose the trigger: When a form is submitted for Gravity Forms (replace with another connector as needed).

3. Click Create at the bottom.
If this is your first time using a connector, you will need to log in to authenticate.
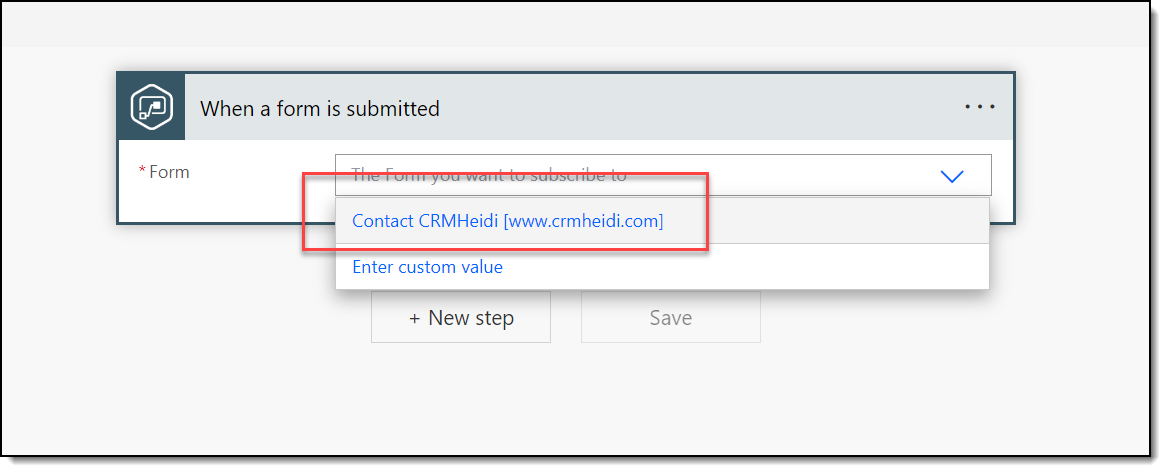
4. Click in the trigger box to select your form for this automation. Then, click Save.
This completes configuration of the trigger! Now it’s on to the actions.
Configure the Actions
List all leads where email address matches a Dataverse lead
I am including this step as a check for duplicates before we add all submissions into my Dataverse environment. You may also want to configure an approval step if necessary.
- Add a new step. Search for Dataverse and find the action called List rows:
![A screenshot of a computer
Description automatically generated]()
- Search from the list of actions to find Dataverse’s action Get a row by ID.
![A screenshot of a computer
Description automatically generated]()
- Select Table name: Leads then click “Show advanced options.”
![A screenshot of a computer
Description automatically generated]()
- In the Filter rows area, enter the following: emailaddress1 eq and then add Dynamic content from your trigger step for “Email:”
![A screenshot of a computer
Description automatically generated]()


Second Action: Apply to each
For the next action, we will use the Control connector.
- Add a new action, select the Control connector then choose Apply to each.
![A screenshot of a computer
Description automatically generated]()
- In the Apply to each box, select the dynamic content of value in the “select an output form previous steps” box:
![A screenshot of a computer
Description automatically generated]()
- Click Add an action within the Control box.
![A screenshot of a computer
Description automatically generated]()
- Select the Control connector:
![A screenshot of a computer
Description automatically generated]()
- Select the Condition action. This will give us a Yes path and a No path to complete our flow!
![A screenshot of a computer
Description automatically generated]()
- Now, we configure the Conditional action. We want to see if the email entered on the form submission is already in Leads. In the Choose a value box, use dynamic content to enter the email from the trigger step. The second box should say is equal to. For the third box, use dynamic content to enter the primary email address from the list rows action. It should look like this:
![A screenshot of a computer
Description automatically generated]()
- Now, in the If yes box, you can configure additional actions you want to take if this form submission is already a Lead in your system. This could be:
- Send a notification
- Send me a Teams message using the Teams box
- Update the existing lead in CRM
- Or others!
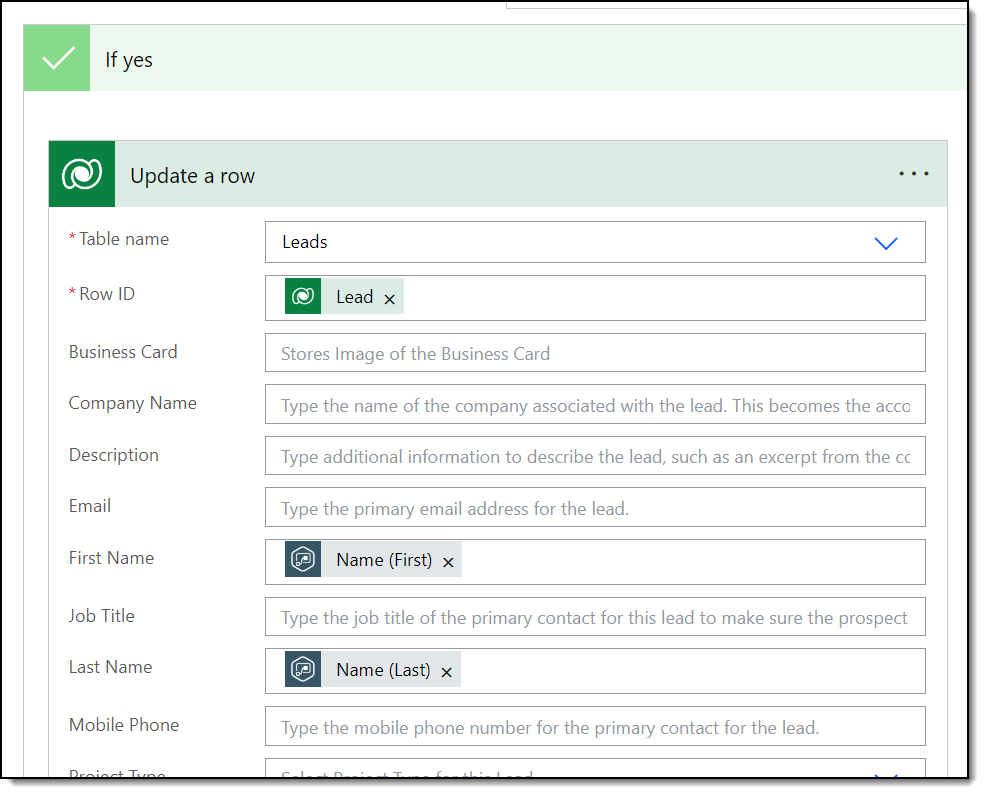
- Yes path configuration:
- For this example, I will update First Name and Last Name on the existing Lead. Select the Dataverse connector, then pick the Update a row action:
![A screenshot of a computer
Description automatically generated]()
- For this example, I will update First Name and Last Name on the existing Lead. Select the Dataverse connector, then pick the Update a row action:
- Configure the following information:
- Table name: Leads
- RowID: use dynamic content to select the unique identifier of the Lead from the List rows step of your flow.
- First Name: use dynamic content to select the first name from the trigger step.
- Last Name: use dynamic content to select the first name from the trigger step.


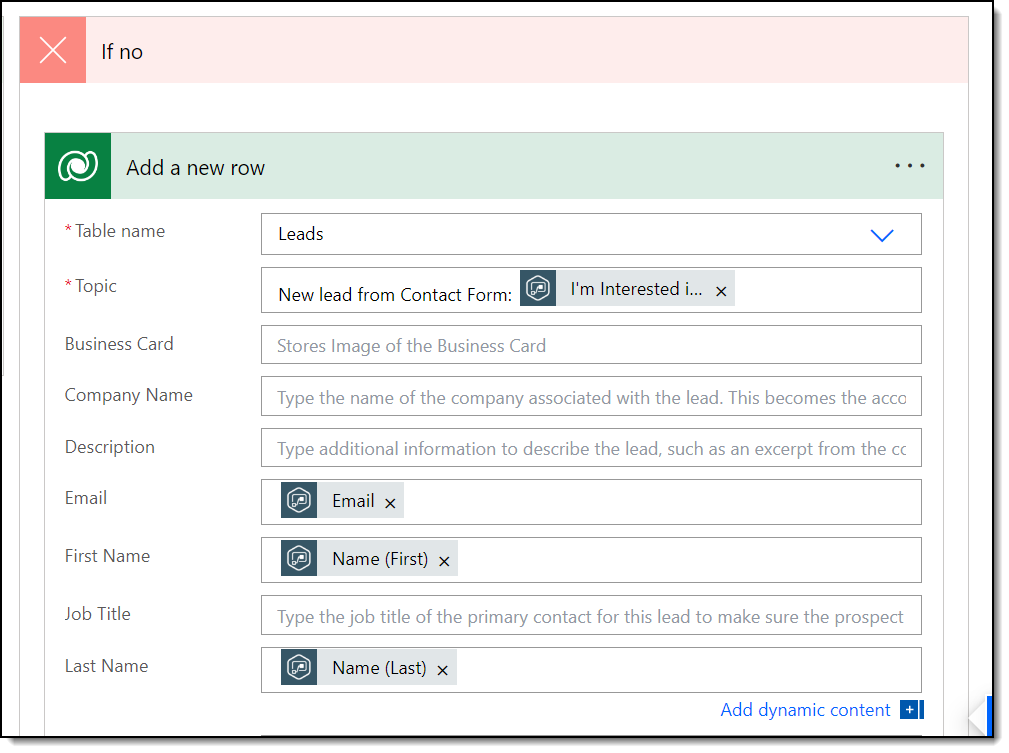
10. No path configuration: If a match is NOT made on the Leads table, we want to add a new lead to CRM. Perform the following steps under the If no box:
- Click add an action, select the Dataverse connector, then pick the Add a new row action:
![A screenshot of a computer
Description automatically generated]() 11. Configure the following information:
11. Configure the following information:
- Table name: Leads
- Topic: Required field in Dataverse – select appropriate field from your trigger step with form data.
- Email, first name, last name, etc.: Map all other fields that make sense using the dynamic content from your trigger step.
 11. Configure the following information:
Test Your Flow
That is the flow! Make sure to run the Flow checker, then test your flow to ensure it works as expected.
The post Power Automate: Create Lead from Form Submission appeared first on Dynamics Communities.