As you know, when purchasing inventory, the value of the inventory can include more than just the amount paid to the vendor. Often, there is freight to get the inventory to you, duty or import fees if the product is coming from overseas, or even setup and installation fees. Companies often want to include all those additional costs as part of the inventory value. Business Central (BC) provides the ability to capitalize those costs by using a function known as Item Charges. This post will discuss how to set up and use Item Charges.
Set Up
The set up for item charges begins with the creation of General Prod. Posting Groups. Item Charges uses the General Posting Setup table to control the accounting for Item Charges. Open the Gen. Prod. Posting Groups and add a code for the type of charge you want to capture. The next stop is the General Posting Setup table. When using Item Charges to add value to purchased items, the system uses two columns on the General Posting Setup page:
- Purch. Account
- Direct Cost Applied Account
For this function, it is recommended that the same G/L account is used for the two columns. Note that while the system will post debit and credit to the accounts, the entries will offset so it’s not too critical what the account number is. You will want to enter accounts for those two columns on a line containing the Gen. Bus. Posting Group (“GBPG”) and Gen. Prod. Posting Group (“GPPG”). The GPPG code was created above. The GBPG was most likely created earlier in your implementation and assigned to your vendors. Create a line with that combination of codes which will match the combination of vendor and item charge needed.
The last piece is to create the actual Item Charge code. Open the Item Charges page and create a code for the charge you want to capture. Fill in the description and enter the previously created GPPG you want to associate the item charge with.
Processing Transactions
So, now that you have everything set up, how do you process the transactions? Note that prior to posting item charges, you first need to receive inventory. You can’t post item charges if you haven’t yet received inventory. This receipt can be on the same purchase document if the vendor is including freight or other charges directly on the invoice, or the receipt can be posted earlier if theitem charge is being posted separately. For this example, we’ll assume that the inventory was previously received and we are adding value later (freight costs for this example).
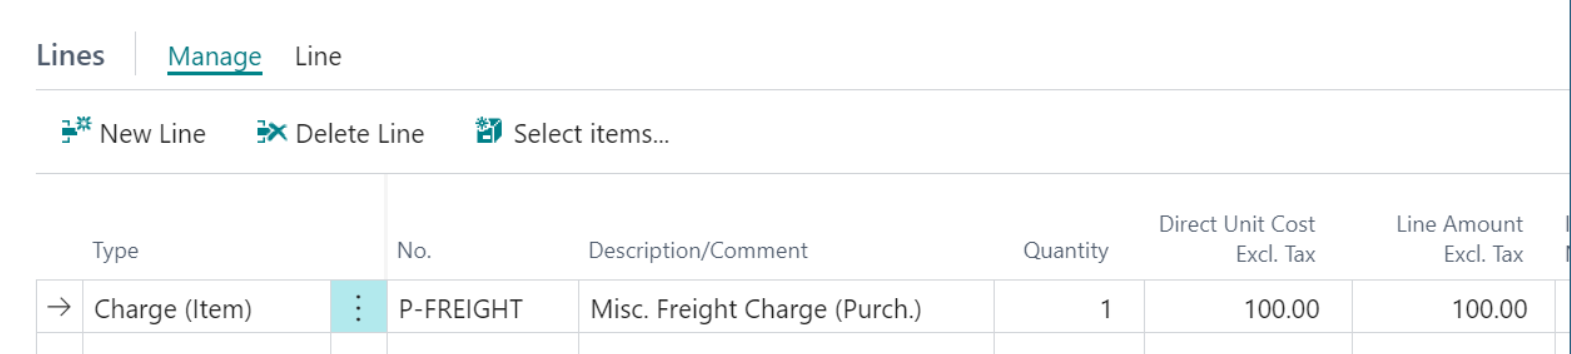
Create a new purchase document (either order or invoice) for the payment vendor. In the lines section, add a line where the “Type” is “Charge (Item).” Don’t get too hung up on the fact that the type reads “Charge (Item),” but the functionality is labeled “Item Charges.” It’s the same thing. In the No. field, click the dropdown to select the desired Item Charge code. Then, fill out the rest of the fields on the line as you normally would with a quantity, Direct Unit Cost, etc.
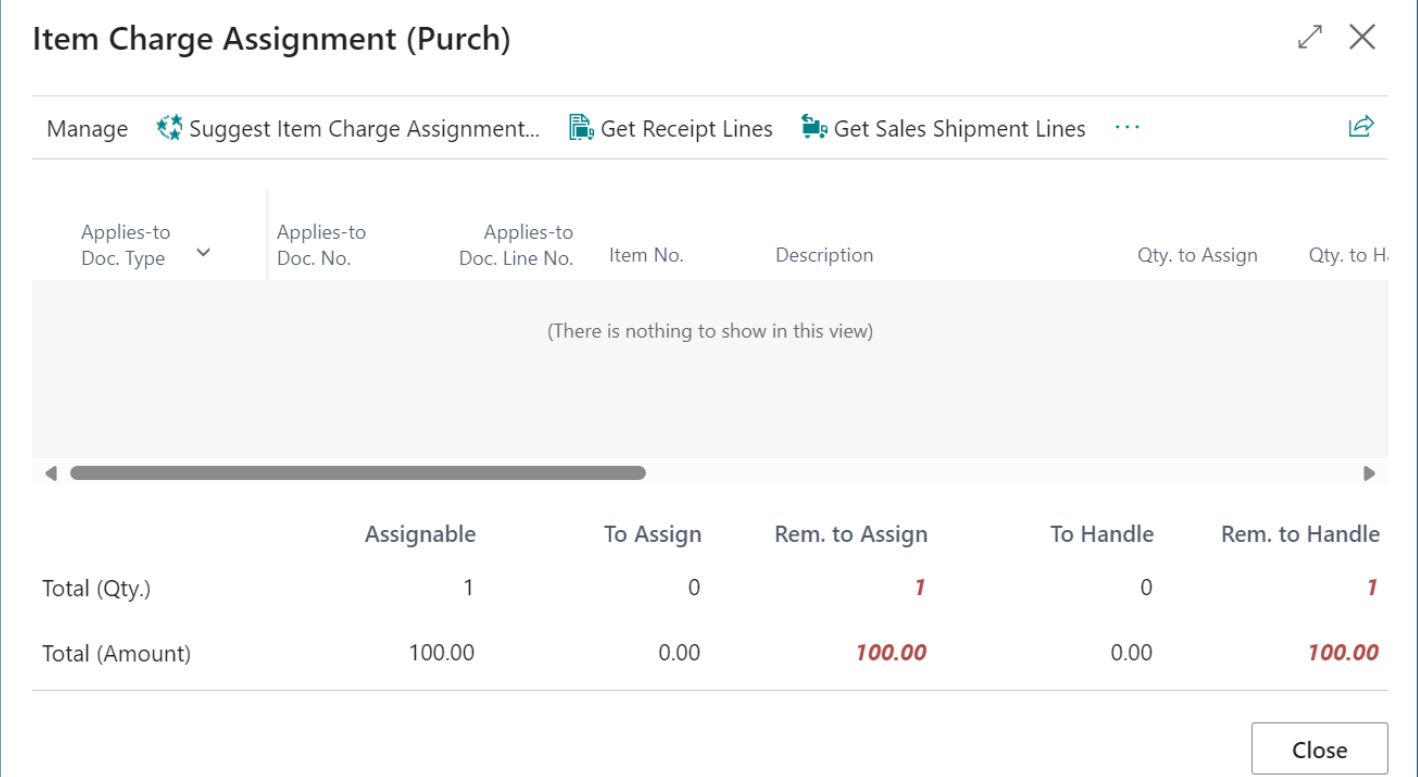
If you try and post at this point, the process will throw an error telling you that you need to “assign” the item charge prior to posting. Since Item Charges add value to received inventory, you need to tell the system what inventory to assign the cost to. On the Lines section, click on Line / Related Information / Item Charge Assignment to open the assignment page. Note that if you are adding item charges to an invoice where the item lines exist, this page will be pre-loaded with those lines. If not, you will need to add lines.
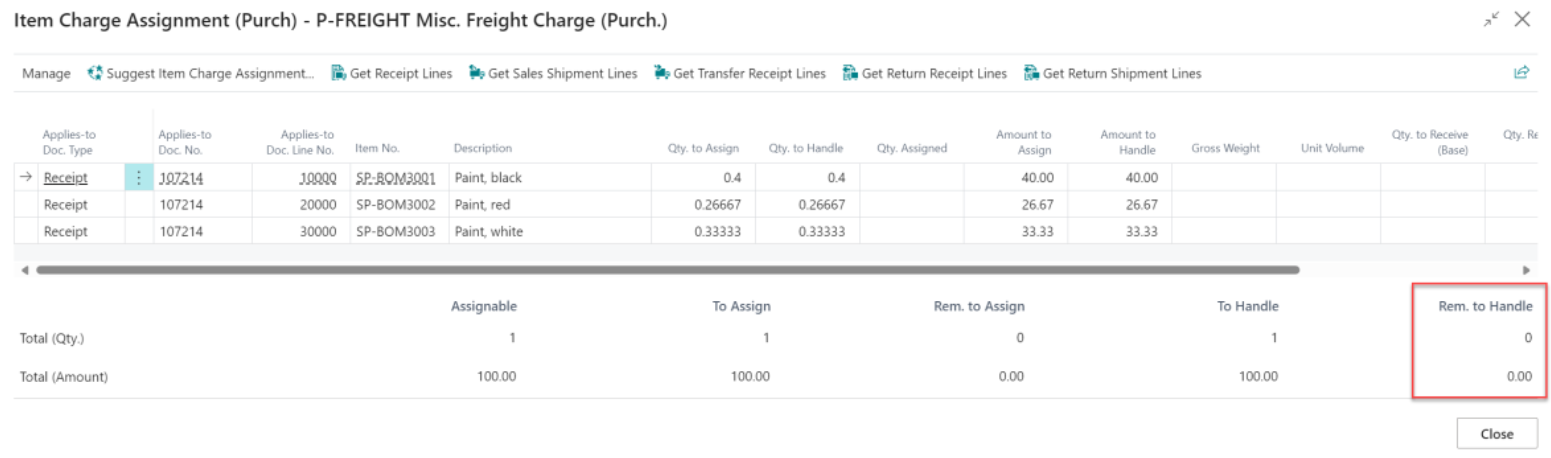
To add lines, click on Get Receipt Lines. You will be presented with a list of all the item receipts. Select the desired receipt line(s) and click OK to bring them back to the assignment page. Now that they are included on the assignments page, you will need to allocate the item charge across the selected lines. Click on Suggest Item Charge Assignment from the menu.
If there is only one item line on the page, the system will automatically assign the item charge to that line. If there is more than one item line, the system will prompt you for how you want the item charge allocated to the lines. You have four options (Equally, By Amount, By Weight, or By Volume). Select the method and click OK. Verify that the Rem. To Handle for both the Qty. and Amount are zero at the bottom right corner. This shows that the item charge has been fully allocated. Click Close to return to the purchase document.
Now that the assignment process is complete, you can go ahead and post the purchase document.
Reviewing the Results
When reviewing the results, you can look at two places. The first is the General Ledger Entries where you will see at least four entries as follows:
- Debit to the Inventory Value
- Credit to Accounts Payable
- Debit to the Purch. Account pulled from the General Posting Setup
- Credit to the Direct Cost Applied Account also pulled from the General Posting Setup
The last two lines above should have offsetting values and will net to zero. The second place to look is the Item Ledger Entry. Navigate to the receipt line for the item you assigned item charges to. Notice that the Cost Amount (Actual) value should now be higher than what it was previously.
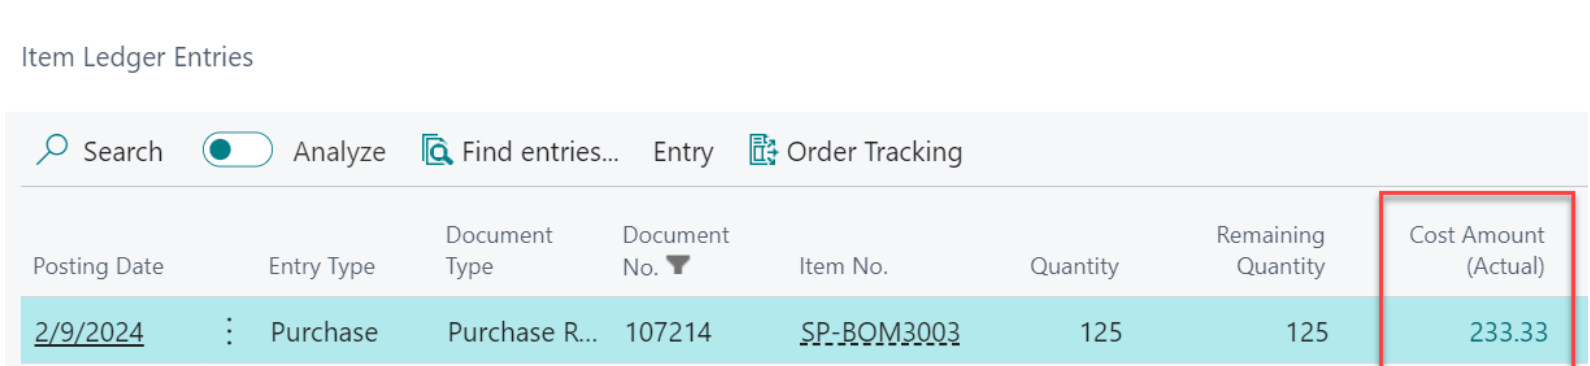
Click on this amount to drill into the Value Entries table. You will now see the original value for the inventory when received along with the additional value posted from the item charges. If needed, you can multiple item charges assigned to that receipt depending on how many charges you need to assign.

Summary
Accurate costing of inventory is a requirement for every company. Item Charges are a useful Business Central function that ensures that you are able to fully value your inventory for your financial statements.
The post Working with Item Charges in Business Central appeared first on Dynamics Communities.